Showing posts with label Australians in PNG. Show all posts

Friday, August 19, 2011

Kokoda Campaign: Pitoki patrol & Deniki Hill action

Its been ages since my last post but for some reason winter has been as hectic as anything - barely time to finish painting my Prussians! (which I will and post the results)  But of course, there's always time for a decent wargame.  We have patiently awaited our Allied commander Doug to return from foreign lands so that we can resume the Kokoda campaign.  Herewith is the next instalment of the action. 


PITOKI PATROL


Following the previous patrol actions at Naro and Fela, the battered 39th, ordered by Allied Headquarters in Australia (now also known as ‘Fantasyland HQ’) to retake Kokoda, attempted to fulfil those orders without getting wiped out in the process. We started with patrols carefully probing Jap positions around Pitoki village, the scene of the previous near-disastrous attempted ambush of the Japs advancing from Kokoda.  A depleted company of the 39th of three platoons with attached PIB (Papuan Infantry Battalion) acting as guides led by Michael, Ian and me under the overall command of Doug, cautiously approached Pitoki village from three directions.


The Pitoki table - all the action took places in the jungle at the corners! 
And yes, those are conifers - we had to dragoon foliage from everywhere to pad out the jungle patches.

The Japanese under Greg, Cameron and George had time to dig in and so were awaiting us in prepared positions rather than the usual scrapes we had used when they were attacking us.  Our Papuan scouts had told us that there could be up to a company of Japs now entrenched in and about Pitoki but concealed in thick jungle, the well-prepared Japs were difficult to spot even with our redoubtable PIB scouts.  And moving through the jungle no matter how cautiously, there was the real risk that they would spot you first.  The first contacts occurred when we were practically on top of one another.

I think Michael's patrol made the first contact - note the Papuan scout diving for cover!

Ian to the north of Pitoki (and on the other side of the river) had great difficulty locating the entrenched Jap positions in the jungle but Michael to the south ended up getting spotted by the Japs who immediately opened up on his lead patrol (with PIB scout).   Originally he had intended to cut across open ground to the native gardens opposite the village but luckily his platoon never got that far, encountering and exposing dug-in Japs ringing the edge of the jungle in front.  Had his men stepped out into the open Greg revealed later he had one of his dreaded snipers lying in wait to pot the officers and NCOs.  Fortunately for the Allies, this was the first of our encounters where we didn’t suffer officer casualties from snipers. 

Having probed the defences and provoked a reaction (forces equal to or greater than theirs) both Ian and Michael’s platoons conducted a reasonably secure withdrawal.  On the other side of the table south of the village, it was a very different story.

I had intended to stagger my advance with one rifle section, LMG and PIB scouts going first, followed by the platoon headquarters section (with our precious radios) and the second rifle section with the Bren LMG following up the rear.  C-inC Doug insisted that they all sweep forward in a single or joined group so that (sensibly) if any element were attacked, one of the others would be close enough to support it.  

Rifle section with HQ section behind (eventually) find a Jap foxhole

After three turns my HQ section came under fire (George’s Japs spotted them first) but my PIB scouts and leading section finally spotted other entrenched Japs to our left.  In the thick jungle actually hitting your target is extremely difficult and it took the concentrated fire of the entire rifle section three rounds to wipe out just two foxholes of Japs – we never found a third right in front of us.  

2nd section advances while the 1st eliminates a second Jap foxhole 
(red marker notes the position is 'suppressed')

At this point George advanced a section to our right, threatening my flank then at the same time advanced a full platoon directly behind me (from the direction we had come from in fact), effectively trapping the Australians between them and threatening to cut my platoon off completely.  The ongoing fire-fight had been confusing but the honours up till that point in our favour (1 dead to 3 Japs).  Then all Hell broke loose.

 Georges' cunning Nipponese sneak up behind - note the 2nd foxhole in front has been eliminated

We couldn’t spot the Japs behind us but they spotted our HQ section just in front of them and a murderous volley at close range virtually wiped it out.  While we knew we were being fired at from behind as well as in front, we just couldn't spot the Japs in the thick jungle.  Another intense round of shooting left just the officer, who managed to join the section in front of him.  At this point there was no question of continuing to push towards the village, but rather of cutting our way out of the Jap forces who all but encircled us.

The surviving Japs from the nearest section BANZAI!!! - a desperate hand-to-hand ensues.

After the HQ section were cut down, the next Jap section opened up on the closest Militia rifle section.  Fortunately this time their shooting was off and for a loss of two or three, we returned fire, accounting for all but four of the 15-man section.  But rather than flee into the jungle, the Japs once again (predictably) failed their 'Guts' test and decided to die for the Emperor - BANZAIIII!!!!  


Here's where it got really nasty - in the hand-to-hand for the loss of one rifleman and a PIB scout, three of the surviving Japs were taken down which left just the officer.  With his Samurai sword he then proceeded to slice and dice teppenyaki-style through the remainder of the Aussie squad.  Four times I rolled to cut him down and four times failed - that's four D8's in a row!  At long last the remaining PIB took him out - he must have been worn out from all that chopping as Papuans normally don't mix it hand-to-hand. But just as I was just about to promote the brave chappie to corporal, he may have disappeared into the bush, never to be seen again!  

The stunned survivors of the 1st section have cleared the way for our withdrawal - only just - and in the nick of time from the converging Japs

With less than half my platoon left alive and hordes more Japs closing in from front and behind, it was time to bug out as best we could.  We used our LMG to cut down more Japs from Georges HQ section that tried to interdict and managed to use the jungle to cover our hasty retreat back to Deniki.  Big George's clever ambush/encirclement very nearly came off - only the steady courage of the Aussies and some good shooting when we needed it most that saved us.

ACTION AT DENIKI HILL

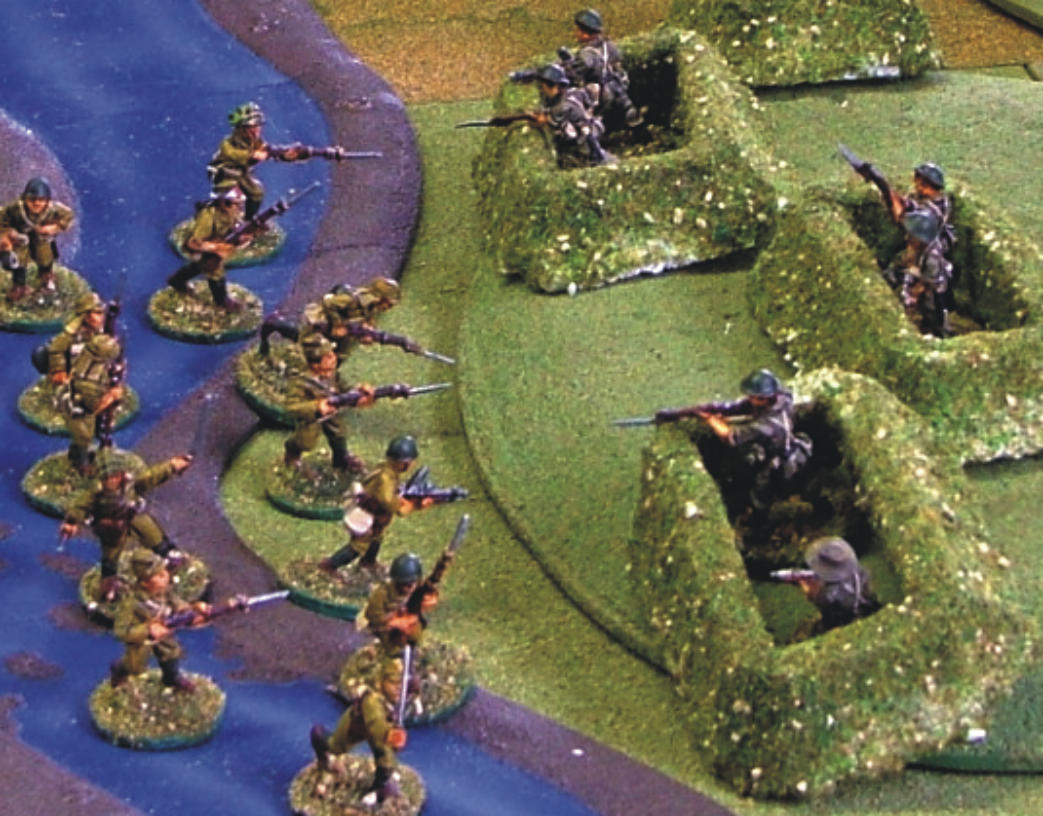
Meanwhile at Deniki our PIB scouts had reported finding lots of tracks behind our lines.  They led up a hill near Deniki and a force of tired militia from the depleted company at Deniki were dispatched to hunt down the Jap patrol.  Ideally, we should have taken prisoners to find out what the Japs were up to - but we found out just how difficult that is with Japs determined to die for the Emperor!


Doug took command of one platoon and HQ section on one side of the hill while Michael and I took the other two sections with attached PIB scouts to sweep around the other side, with my section edging around the base of the hill to (hopefully) cut off the Jap's remaining avenue of escape.  Campaign referee Andrew also told us that the Japs had dug in overnight. Great. After what we'd just experienced with dug-in Japs at Pitoki, we weren't too happy at the prospect of entrenched Japs waiting somewhere on a jungle clad hill to bushwhack us, so we proceeded with great caution.

Papuan scouts out front, my section cautiously moves around the base of the hill at Deniki

After a few turns of finding nothing (Jap commander Dom had hidden his boys well), the first contact came all at once - a Jap squad in a string of foxholes directly in front of us - both sides opened up simultaneously!  What happened next I think I will dine out on for some time during this campaign.  Having a full section of nine with a Bren LMG I got 14 x D10 to roll.  Dom's rifle-armed squad got 7 x D10.  Result - Aussies: seven hits and seven kills, Japs 0.  After my crap rolling earlier I felt vindicated - until Doug 'Blamey' informed me I was meant to take prisoners!  Bit difficult if they insist on dying for the Emperor SIR! 

Empty emplacements show where we cleaned out the Japs - the more important officer and his radio on top of the hill has just been spotted by Michael's Papuan scout - now if we can just get him to surrender...

I swear we tried to take some prisoners, but Dom's Japs just weren't interested!  We got into a fire-fight with the Jap command squad on top of the hill, rather than get into a hand-to-hand and then try to affect a capture, with the predictable result.  Doug's endeavours were not much better - those Japs just didn't want to come quietly!

Doug's and Michael's sections converging on the remaining dug-in Japs who predictably died for the Emperor.

We were told by Andrew that the Japs didn't have any documents for our intel boys - just a radio - so that to find out what they were up to or what they knew we had to capture them.  Somehow I think if we didn't capture the officer or radioman we wouldn't have found out much anyway.  On the plus side the  use of the PIB - splitting them up amongst the militia units in a scouting role - has proved to be  much more effective.  For all the fighting and even further losses, only one seems to have deserted permanently - a remarkable achievement.  


Deniki Hill was the most successful action of the campaign so far for the Allies in terms of casualties - I think 1 Aussie/PIB for an entire section of Japanese.

It was a fun way to end an afternoon's long-awaited gaming - having both the best and worst of the dice rolls that day too.  The poor 39th are slowly but inexorably being ground down - but a shadow of the inexperienced young men who started out from Port Moresby only a few short weeks ago.  But they have become experienced, forged in the crucible of the merciless battles of the Kokoda campaign.  


The Japs emerge from the jungle south of Pitoki village, attempting to pin the Aussie militia's left flank, sandwiching us between the rest of the Jap platoon coming from the Deniki direction and cutting off our line of retreat.

Things are going pretty much for us as they did for the original Aussie militia in 1942; at this stage, not so good!  


Anyhow, I'm reliably informed that Japanese spies may read this blog - so I can't give  too much away.  As usual thanks go to Andrew for running the campaign and refereeing the games, Doug for the venue, table (and the rations!) and of course the rest of the boys for as ever, congenial company and gentlemanly gaming.  And for not hanging too much crap on my dice rolling and mutinous mutterings - except 'Blamey' Doug that is! ;-)

My next post will hopefully not be so long after this and will likely be my finished FPW Prussian army. Just one battalion of Rhineland contingent infantry (Hesse-Darmstadt) to go.  Yippee!

As always, click on the pics for an enlargement and feel free to leave a comment or two, they are gratefully appreciated.

Cheers,
           Doc 


Tuesday, March 15, 2011

The Battle of West Kokoda Pt.1

After much unavoidable delay we finally finished our initial Kokoda battles for the airfield with the fight for West Kokoda. These battles are following an increasingly familiar outcome: determined and ferocious attacks by overwhelming numbers of Japanese in the most difficult of conditions resulting in the annihilation of the Allied forces (after some fierce resistance of course).

The Japanese night attack with HMG fire overhead and a ubiquitous star shell drifting down as they 
advance through native gardens towards the Aussie positions at the top of the escarpment.
(Photo courtesy of Greg Blake)

After the debacle of the East Kokoda fight, the Allies (Australian militia with some local Papuan constabulary) under the command of C-in-C Doug (who played Col. Owen, the ill-fated Aussie commander of the 39th) and myself now faced at least two companies of veteran Japanese.  At our disposal for West Kokoda we had three under-strength platoons of militia, one of which was the Headquarters platoon made up of the battalion’s cooks and clerks and supported by one Vickers HMG – our only heavy weapon. 


The Japanese assemble and advance through the mist shrouded native gardens below the escarpment.

Our opponents were the redoubtable Greg and Cameron commanding the South Seas Detachment – Nankai Shitai – (the 144th Regt) of Japanese veterans.  Apart from several HMGs of the Woodpecker variety they were accompanied by numerous mortar tubes and a mountain gun - more freaking star shells!  Now a less experienced opponent may have just relied on their overwhelming numbers and thrown them against us in virtual human wave attacks (not too far removed from what happened historically!) but not these two.  I'm afraid they were rather stingy in offering their troops opportunities to die for the Emperor.


The next wave of Japs makes it to the base of the escarpment directly blow the village
(Photo courtesy of Greg Blake)

Greg’s first attack was on the centre of the Aussie line located along the edge of a tall escarpment, the Japs advancing through the native gardens, cleverly created by Andrew (the game adjudicator and Master of Terrain) to the base of the escarpment and (temporarily) out of the Allied fire.  Like all previous attacks, these were made in the dark of early morning, visibility also hampered by mist and heavy drizzle.  The Japs weren't visible until they closed within 15” of our positions.  Bearing in mind that firing would expose the location of our positions and although dug in, they were only ‘scrapes’ – shallow emergency trenches – and only one pip's worth of cover!


By Turn 2 the first Japanese sections managed to climb the escarpment and 
were into our positions before we could cut them down. 

Being once again at night with mist and rain made the Allied job of acquiring targets amongst the advancing Japanese extraordinarily difficult.  Our rolling for shooting did not help either - the lone HMG did some long range execution once - then failed to inflict any significant damage and was repeatedly under return fire.  We ended up trying to withdraw it on about Turn 3 and only managed to get the crew wiped out.  In the end it was the brave cooks and clerks platoon who managed to carry it off to safety.  We also made a rather costly blunder (in my opinion) by failing to grenade the Japs at the bottom of the escarpment.  Historically the Japs suffered grievous losses from Aussie grenades while scrambling up the near vertical slope.  We fired everything off but failed to kill more than half of the lead section who slightly outnumbered us in the subsequent hand-to-hand.  The end result was the total loss of the two sections of the 1st platoon - and I whined about grenades for the rest of the game!  


Doc's dilemma - now I've stopped whining about grenades, should I shoot again or just run away?
Andrew's helpful advice - you can do both - and so we'll attempt to 'shoot 'n scoot'!

To be fair we did get to use them once and they were remarkably effective, causing about four casualties on a decimated Jap section which then routed - the only time I can recall it happening so far this campaign!  Mind you they did manage to rally but the usual experience is Jap units that fail their Gut Check (morale) immediately BANZAI!!! right at you! 


The ominous view from Maj Callow's position at the end of the village: 
the Japs close in through the mist and rain.

At the other end of the village at the furthest point on the escarpment was Major Callow's depleted platoon of two 7-man sections.  Here I deliberately held fire until the Japanese were in visible range so didn't open up until Turn 3.  The idea was not to reveal my positions and invite an overwhelming response from over three times the number of advancing Japs.  But either way you were going to cop it as the Japs lit up our positions anyway with repeated star shells which meant of course Japs outside of normal visible range (but well within shooting range) could also range in on you once you fired but without you being able to see them and effectively fire back!  


The Aussie positions are lit up once again by the ever present Jap star shells.

How the heck you are supposed to defend a position in those circumstances is beyond me - the Allies have tried three times so far and failed completely each time!  I even invited my Jap commander Cameron to fail his Gut Check - the idea is to provoke a charge and grenade 'em at close range -  but in spite of his best efforts he passed every time!  Nothing seemed to be working for the Allies.

How will they stop the Japanese hordes?

Will anybody survive?

Stay tuned for Part 2 of the Battle for West Kokoda!

Cheers,
          Doc

Monday, December 13, 2010

The battle of East Kokoda, part 2

The battle commenced with a crescendo of mortar and mountain gun fire.  The eerie half light thrown off the mist by the star shells showed the fleeting ghostly outlines of the first waves of Japanese troops coming on - fast!
 The mist shrouded village comes under fire.

Templeton's men opened up first.  A D1 to acquire meant a 10% chance and Doug rolled well for his forward sections but less so for the Vickers which tried repeatedly to find targets.  Every allied volley was responded to with a hail of mortar and gun fire.  The Japs soon zeroed in on the Vickers and the mortar.

Templeton's men come under increasing mortar fire - the green marker indicates the mortar has been activated to fire.
In the distance at the end of a clump of jungle is the redoubtable Hajimoto-san, sniper extraordinaire.

Captain Bistrap's D Company consisting of 16th & 17th platoons (each of three 9-man sections, each with a Lewis LMG)  covered the Administration buildings at the end of the airstrip.  The Japanese were massed in a wide arc covering the end of the plateau and came on to our front and left flank. 
 
In order to shoot the Japs they had to be within 12" - but of course at that range, they can also see you!   Their natural inclination during the first half of the battle was to close in fast and attempt to overrun the position.  Which gave the defenders only one chance to cut them down before they got in amongst our foxholes.  Mercifully, Bistrap's leading platoon performed admirably and cut down two sections at close range.  But once their positions were revealed by firing, between the waves of advancing Japanese they were pounded by mortars, artillery and HMG fire and began to sustain heavy casualties almost immediately.

 The Japs close in on Bistrap again.  Note the Jap NCO on the edge of the Admin hut - 
the lone survivor of the 1st Banzai charge that came perilously close to getting into the position.

The Japs were now hitting us on three sides, having worked their way around in the jungle opposite the airstrip. Along with the infantry they infiltrated three snipers that began to cause casualties between the infantry assaults, picking out the officers and NCOs.  They proved to be devastatingly effective, taking out each of the Australian officers in turn.  The first to go was Bistrap.  Nice and safe in his foxhole under the Admin hut, he was forced to make a dash to his forward section to rally them after they began to panic under heavy fire (and casualties).  His 9" movement bought him agonizingly just short of the neighbouring foxhole. Here Greg and Ian rolled a D1 and BANG! - poor old Bidstrap gets it in the back.

This was the start of the disaster that was to roll over the Australian defences. 

 Bistrap's forward defence line - note the mortars observation team in the elevated hut - it didn't help as they couldn't see a thing!  Cut off by the flow of the battle they are now missing presumed dead.

Meanwhile B Company under Templeton (Doug) were coming under increasing pressure with Banzai attacks that made it right up to the edge of his position.  Together with the incessant Japanese fire, Templeton was called on to remove the suppression time and again.  Worse was to follow as the Vickers HMG - so effective in the Oivi battle - failed to acquire any significant targets before being zeroed by the Jap mortars and then taken out.
 The waves of Japs were getting closer all the time.  The lone survivor of an attack - the next overran the position
(Photo courtesy of Greg Blake)

Ian's Japs now also closed in on Bistrap's now leaderless company (or what was left of it).  Somehow they acquired the target no less than four times and wiped out two Jap sections - but there were three times that number coming at them!  A third Jap section charged home and a vicious hand-to-hand ensued for the Admin hut with the remainder of the Australians holding it wiped out.

With the Japs holding the hut, the remaining section poured fire into it to wipe them out in turn (save for one crazed sword-wielding survivor).  

Doug (Templeton) beat off another charge on his position in front of the village also at heavy cost.  At this point disaster struck again for the Australians.  His position repeatedly lit up by star shells, the gallant Templeton repeatedly exposed himself to enemy fire to rally his exhausted men only to fall victim to the same sniper that killed Bistrap. The redoubtable 'Hajimoto-san' had struck again.
Hajimoto strikes again!
(Photo courtesy of Greg Blake)
The attacks on the leading positions came in waves, interspersed with increasingly accurate fire of all kinds.  Jap commander Ian cleverly changed tactics, instead of charging in yet another section, got within the 12" and then used his numbers to win the fire-fight - outnumbering the opposing Australians more than three to one, the Japs were able to absorb their losses while at the same time pouring fire into the Aussie position.  The last remaining section of Bistrap's forward platoon were wiped out.

The final Japanese assault overruns the Australian positions on the edge of the plateau.
The last series of turns effectively involved trying to disengage from the Japanese and effect a withdrawal but saw vicious hand-to-hand fighting in which most of the surviving Australian units were caught in the Jap pincer movement and destroyed. 
 Ian's Japs close across the airstrip, trapping the survivors of Bistrap's D Company.  The survivors of B Company including the attached HQ Support section are cut down by Greg's victorious Japs as they try to withdraw through the village.

After Templeton was shot, Major Watson had bravely left his shaky Papuans - earlier they had attempted to winkle out the Jap snipers across the airstrip but it ended in failure, with the section being shot down or fleeing after their NCO was killed.  Watson got into the hut at the end of the village and successfully rallied Templeton's men for the last time.  At this point he ordered a withdrawal but this was ignored by the surviving militia NCO (clearly out of his mind eh Doug? ;-)  The Japanese charged in yet again and further hand-to-hand saw most of the surviving members of B Company wiped out.  The brave Major shot two with his faithful Webley hand-cannon but was himself shot down as he left the hut to rejoin his Papuans and the surviving Australians.  The position well-lit by shells, sniper Hajimoto-san had no trouble dispatching his third officer! BANZAI!!!

The survivors withdraw - less than three sections out of two & a half companies. The yellow counter on the roof of the hut yet another of those @#$% star shells!

Some of the 39th HQ Support attached joined up with the remaining two Papuan sections.  Some, like the observer team, were cut off and  although not killed in the final round, nonetheless are missing, presumed dead.  The final butcher's bill was over 100 Japanese (similar losses to the Oivi battle) but over 50 Australians and Papuans including most grievously, irreplaceable heavy weapons like the Vickers and all LMGs save one.

So ended the battle for East Kokoda, the battle for West Kokoda, the airstrip itself, promises to be even more challenging especially in the face of the Australians heavy losses - fully half of the 39th Battalion - virtually the only troops between the Japanese and Port Moresby!

Another brilliant scenario from Andrew - one of the most challenging I've ever played - aided by the expert handling of the Japanese forces by Greg and Ian.  A thoroughly enjoyable afternoon - pity we have to wait until next year to complete the first Battle for Kokoda!

Cheers,
          Doc
Had to add one last 'shot' of Hajimoto, deadly sniper!
(Photo courtesy of Greg Blake, tinkered with by me!)

Tuesday, October 26, 2010

The start of the Kokoda Campaign - continuation of the first encounter battle

In the previous post we left off where we'd just (barely) beaten off the first wave of attacks.  The two squads of our 1st platoon just had enough time to dig themselves some foxholes before the Japs started to come at them.  As it was historically, the Japanese moved with astonishing speed and were literally on top of the Aussies before they knew it.  Seekamp's advance platoon was quickly surrounded by the Japanese scouting units.  Between the waves of assaults, the Jap mortars continually tried to zero in on the concealed Australian positions.  Almost from the beginning they were subjected to sustained heavy fire from mortars, MGs and even snipers, between the wave after wave of screaming Japs!

1st and 2nd sections 1st platoon dig in and await the next assault

The Japs directly in front of us formed up for their next assault and every man who could get a bead on them let loose.  Two things proved to be invaluable - the siting of the Vickers MG at the top of the track and the Papuan platoon who commander Doug (Templeton) decided to hold back in the jungle on the ridge.  Historically the ferocity of the Jap naval bombardment and landing terrified the poor local Papuans who took to the bush to hide - including most of the PIB!

Holding them back at the ridge proved to be a very smart move as it gave them a chance to do what they  actually do best - shooting.  They may have been very poor infantry but were natural hunters and very good shots.  Their shooting and the Vickers helped whittle the Japs down sufficiently to enable the 1st platoon out front to repel all but the final assaults that day.  Had they have not done so, I reckon my position would have been overrun by about turn three.

The northern (Aussie) end of the table, looking across.  The Papuan militia are in the jungle closest.  The picture was taken before the final turns of the day: the Vickers came under accurate mortar fire and the remnants of the 1st platoon & mortar section are sheltering in the jungle to the other side of the MG position.  Last assault of the day is going in on the 2nd platoon on the far side of the table.

The southern (Japanese) end of the table at the final turns of the day.  The remnants of 1st platoon have been pulled back over the river and the Japanese are just about to launch their final assaults for the day on 2nd platoon dug in on the slope on the other side of the river.  The river like the creek is shallow and no impediment to the Japanese movement!

The assaults on the 1st platoon were continuous and both squads were subjected to an endless barrage of increasingly accurate mortar and MG fire.  Unlike the clear field of fire enjoyed by the 1st section, the 2nd faced some light jungle which provided open cover for the Japs to approach much closer.  Desperate shooting mowed down the first Jap squad but was not as successful against the second, only inflicting about 30-40% casualties!

In between assaults the 1st section came under sustained and heavy mortar fire

The Japs did their 'gut check', decided to ignore the heavy casualties and BANZAIIIII!!!

Light cover afforded by the jungle enabled the Japs to get much closer to 2nd section

The Japanese ran straight at 2nd section's position.  You have a choice - bug out immediately or snap shoot and hope you get most of them before they get you.  I decided on the shooting option.  Half the remaining Japs were gunned down but at the crucial moment, the damned Lewis gun jammed - didn't get a shot off!  Enough Japs survived to go one on one with the Aussies in their foxholes.  A desperate hand-to-hand ensued where the remaining Japs were finally wiped out.   But the damage was done.  Only two men remained of 2nd section.  

 Aftermath of the assault on 1st platoon.  After loosing nearly half their men, 1st section is rallied by their officer in the cover of the jungle after mortar fire virtually obliterated their position.  The two survivors of 2nd section in their foxholes after beating off a frenzied banzai charge await the next pasting from Jap mortars and machine guns.

Once the bayonet fight was over, the mortar and MG fire resumed, killing the corporal which left the hapless Lewis gunner.  He had no choice but to try and make back over the river to 2nd platoon's position.  Halfway across - CRACK! - a Jap sniper took him out.  2nd section destroyed to a man in two turns.  The clapped out but invaluable (when working) Lewis gun ended up at the bottom of the river.  Damn!

The 1st section fared a little better, having failed their gut check twice and getting pinned in their positions, getting hammered by Jap mortars and then making a strategic sprint to the cover of the jungle where their officer and sergeant 'persuaded' them to hold before withdrawing over the river to the safety of the jungle on the other side.  Actually we just wanted to make sure we saved the SMGs and Bren!  Again accurate firing from the Papuans and Vickers MG kept the Japs at bay and enabled the remnants of 1st platoon to withdraw safely.


Meanwhile on the other flank the Japanese had emerged from the jungle.  The Jap heavy Juka MG proceeded to paste the 2nd section position, immediately inflicting casualties.


 As can be seen above, the Australians were forced to withdraw to the other side of the river, preparing themselves for a final stand!  They didn't have long to wait before the next wave of Jap assaults went in.


After wiping out another two squads of Japs the third managed to close with 2nd platoon in what was to be the last Banzai attack of the day.  Fortunately for 2nd platoon their shooting was accurate, aided by enfilading fire from the ever faithful Vickers, who had been manned by PIB after the crew were killed by increasingly accurate mortar fire - mercifully the Japs only managed to zero in for the last few turns of the game.

At this point Jap commander Cameron announced that frontal assaults on the Aussies had been halted as a battalion was now in the process of outflanking the Australian position.  Templeton and his men are now in real danger of being completely cut off from 39 Battalion at Kokoda.   Will the Aussies manage to get out of it?  The next scenario/battle to decide this will be held in about a month's time.

Cheers,
           Doc


Monday, October 25, 2010

The Kokoda Campaign - the first round

The first battle got off to a rattling start.  Our group organiser, Kokoda historian and supplier of most of the figures and terrain, Andrew (one of who's ancestors also fought at Kokoda!) devised the initial encounter scenario that differed very little from what actually happened at Wairopi.   Templeton and his 'B' Company of the 39th Bttn. were the first over the Owen Stanleys and arrived in Buna on the coast just two days before the Japs landed!

 Just an example of Andrew's great scenery - that's some real jungle!

In our scenario Templeton kept half his tiny force together and ordered Seekamp's platoon (me) forward to set up on the slope of a hill facing down the track.  The Australians have three platoons (one of them local Papuan Infantry Bttn) supported by a heavy weapons section of a mortar and a Vickers MG.  We decided to site the MG up the slope pointing directly down the main approach.  There's one Bren and three clapped out Lewis guns for the four 9-man sections (2 sections per platoon).  The NCO's also carry SMG's - mostly Stens at this stage of the campaign - so at least one of those per squad too.


 After rapidly digging in, my 1st squad awaits the Japanese

We also kept the Papuan platoon hidden in the jungle at the head of the track.  The positions are just foxholes - nothing fortified or reinforced as there wasn't time.  Siting of the Vickers proved crucial as it enabled us to bring support fire down on them as they attempted to close with our advance position.


It wouldn't fit into the foxhole created for it - but it didn't look to bad sitting on top.  Although it stands out like dog's whatsits. it is in fact a concealed position!


This is what was coming directly at me - half a company of Japanese.  Their squads are roughly 15 men each, so their platoons are 1/3rd again the size of ours.  They are supported by a heavy MG, two mortars and a mountain gun!  And this was just the first lot - Gawd'elp us!
 
As soon as they came into sight we let them have it.  I was feeling quite chuffed as I easily wiped out the first two squads to a man, but about half of the second got as far as the creek in front.  Here I got my first lesson in being very aware of attacking Japs!  After nearly wiping them out, they did their 'gut check' (morale in Disposable Heroes rules) and they failed which meant...  they either 'Seppuku' and disappear OR ...  BANZAI!!!! 

These guys rush at right you and you've got just one opportunity to pour on the fire and wipe them out because, as my amused Jap commander Andrew helpfully pointed out: 'you really don't want Japanese in your trenches'.  They are quite deadly in hand-to-hand.

The blurry picture is the result of the photographer jumping out of his skin when one of them suddenly gets through!  Fortunately two bayonets were better than one sword on this occasion but bit too close for comfort!

And that was just the left flank.  Same again was advancing rapidly on the right.


That was just the first round of fighting.  My squad soon came under sustained mortar and heavy MG fire, were literally pinned in their foxholes and started to suffer casualties.

The story continues in the next posting!

Cheers,
         Doc