Wednesday, February 27, 2013

Our first Bolt Action game - clash of the paratroops!

Doug, Andrew and myself decided to try out the new Bolt Action rule set (actually Andrew the Rules Guru stepping us through it!) using my Fallschirmjaeger against a mixed US force of paras (504th Airborne) and combat engineers (133rd Infantry Combat Team).  The game is set in northern Italy in 1944 so I can get my Autoblinda into the action too!  The forces were matched at 1000 points each with the Germans having three seven-man infantry squads (with two Panzerfaust each) supported by a mortar, MG and flamenwerfer team together with a STuG III Assault Gun and the Autoblinda armoured car.  The Americans consisted of two reinforced platoons one Airborne, the other infantry each in turn composed of two 6 man para sections and two 7 man infantry sections.  They were supported by a mortar, MG, bazooka and flame-thrower teams as well as a 'Ronson' - M4 Sherman with a 75mm gun.  But there was also another whose presence I had completely overlooked - an Air Force FAO (Forward Air Observer) indicating of course that the Americans had, at some point in the game, access to air support in the form of the dreaded 'Jabos' - US fighter-bombers.  The penny didn't drop until I was asked to leave the room for a bit while Andrew and Doug discussed how and when the air support would happen.

Part of the German force lines up outside the village
The objective for both was an ammo dump in the centre of an Italian village.  The closest to it or controlling it at the end of six turns would be the winner.  The Germans were allowed to deploy one section in the village, being informed that the Americans would be coming on somewhere along the Western edge of the table. The rest of the force came on in the first three turns.  I didn't have enough to defend the entire perimeter of the ammo dump, so took a punt on several buildings at the northern side of the village - with one lonely Landser spending the entire game sheltering in the bunker covering the northern approaches over a river.  The entire US force came on from the western side so he had a very quiet game - the only one to do so as the battle raged around him!

First success goes to the US airborne as they successfully storm a house on the western edge of town
Doug's Americans tasted success in the 1st turn, storming a house on the western edge of town that had nearly half a squad of Fallschirmjaeger in it, loosing two in the process for two Germans and the third with a Panzerfaust taken prisoner.  Doug bought on his other squad at the other end of the village and the race was on to occupy as much real estate next to the ammo dump as possible - and drive out the Germans occupying the northern side of town.

US infantry with a deadly bazooka team arrive at the other end of town
The Americans wasted no time and immediately began to assault the main German position occupying the northern side of the town square.  The first squad of airborne soon came under intense fire from the Fallschirmjaeger  MG in the upper floor of the house overlooking the road.  Unbeknownst to Doug, I had my mortar team observer also in the same house and he directed some very accurate fire from the redoubtable mortar team on the eastern side of the village which soon put paid to the first squad of Americans!  Given you need sixes on a D6 to hit anything at all, I was always a bit skeptical about the use of mortar fire (unless there is a lot of it) but in this game, the dice gods smiled on my FJ  mortar team.

The German mortar crew well positioned on the other side of town kept up an accurate bombardment throughout the game, scoring some stunning successes.
The Americans were frustrated by their loses as they expected to at least be able to break into the village in the first few turns.  To winkle the stubborn defenders out, the Americans brought up their flame-thrower team to wreak havoc, which it certainly did.

The going gets tough for the Americans: one squad tries to break into the southern end of town, while the one in the middle is pinned by German fire and the one at the other end of the road has just come under a deadly mortar barrage.
Lite er up boys! The American's deadly flame-thrower lights up the house with the German MG nest (and the other half of a squad AND the mortar observer!)  Note the very long line of pinned markers next to the house!
By pure chance the Americans had run straight into the most heavily defended part of town and had no choice but to clear the house and its stubborn defenders if they wanted any chance to seize the objective.  They poured fire - lead and liquid - into the house which also had the effect of trapping the half of the defenders that survived.  Once the house was ablaze I really wanted to fail my morale so the men could flee the building - especially my heroic forward observer - but for three turns I could literally do nothing!

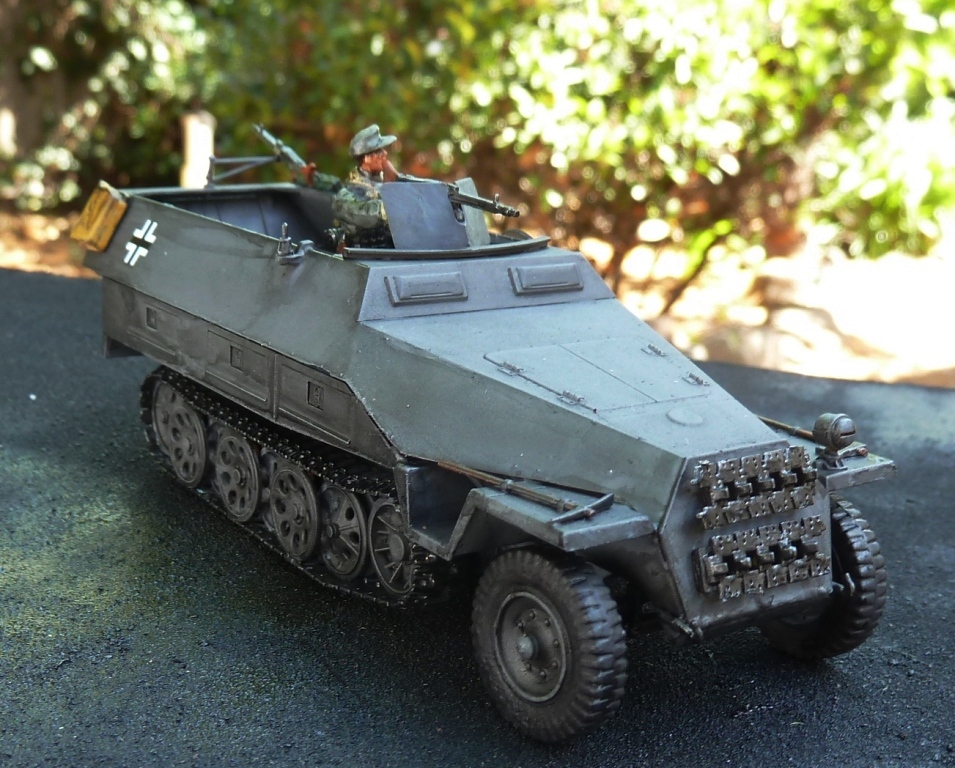
Once this strong point had been reduced, the Americans introduced their armour with the Sherman making an unwelcome appearance.  My Autoblinda had spent the first half of the game playing cat and mouse with the Americans.  The bazooka team had a go at it and of course, the US infantry were armed with AT grenades which made getting too close extremely dangerous for the (lightly) armoured car.  I have to say (and I should have known) that the reverse gear on the Italian armoured car worked even better than expected.  The Autoblinda's shooting was abysmal for the entire game, with its MG killing only one or two but missing an entire squad caught in the open at point blank range!  It also managed to ping a shot off the side armour of the Sherman.  The only thing that saved it was the reverse gear - it skedaddled off backwards every time it was shot at!

The Autoblinda plays hide and seek from one end of the town to the other by vigorously working its reverse gear!  It was frustrating for the Americans who couldn't  get a shot on it and frustrating for the Germans as the Auto couldn't hit the side of a barn either (they are firing one off at the US mortar in the woods opposite and missing as usual!)
The STuG III was a different story.  As it came on at the opposite end of the table to the Sherman there was no tank duel but the STuG threatened the US assault, bringing it to a halt with MG fire and enabling the rest of my FJ squads to come up and get into the town.  I have to say that HE fire from even a 75mm gun appears to be remarkably ineffective against anything but another armoured vehicle in these rules - so against infantry even in hard cover we didn't bother.  Tank MG fire was much more likely to get a result.  

A STuG's-eye view: target is the US infantry hiding behind the wall between the buildings in the distance, the Americans were also about to occupy the house directly in the middle.  Note the German paras behind the house to the left which they were about to occupy, supported by the advancing STuG when... Achten Sie Jabos! Gehen Sie in Deckung!  
The STuG was proving a headache for the Americans who were otherwise winning at this point, forcing their way into buildings next to the ammo dump objective.  In the above photo the STuG's MG had just taken out half a squad of Americans and it was advancing on the survivors when the US fighter-bombers made an appearance. Doug played his secret weapon at this point - an airstrike!  The Americans had several Jabos on call and managed to get several strafing runs in on the STuG including a 1000 lb bomb right on top of it! STuG kaput!

Scratch one STuG!  The building next to it was destroyed by the bazooka team but luckily for me the mortar in the courtyard  survived both near-misses and continued fire support!
At the other end of town the Americans were also having rotten luck with their armour.  Doug only advanced his tank to the edge of town - nervous as I was about the AT capabilities of infantry!  He had good reason to be as he had two Panzerfausts fired at him - one missing and the other pinging off the frontal armour.  Although they can penetrate most Allied tank armour at close range, the Panzerfaust is best used against side or rear - but I had no men positioned to get such as shot in - and the useless Autoblinda missed it's shot as usual.  But amongst the raging inferno of the house opposite, there was one man who had his eye in - my slightly barbecued mortar observer who called in mortar fire dropping right on top of the aptly named 'Ronson' which erupted in a geyser of flame!  Scratch one Sherman.

The Ronson ignites! Courtesy of the singed mortar observer on the top floor of the burning building opposite.
At this point, despite their heavy losses, Doug's Americans were winning as they had successfully occupied the building opposite the ammo dump and could shoot anything that approached.  My paras finally occupied a house at the southern end of the town but it was too far from the ammo dump - all they could do was blaze away at the Americans in the house next to the dump and attempt to give covering fire to my other remaining squad and flamenwerfer team.  Once the Sherman was destroyed it freed up my Autoblinda to make a direct assault on one of the remaining US squads - including that bloody flame-thrower - next to the town square.  It duly drove right up to the sandbag barrier at the end of the street and let loose with its MG at point blank range.  I can't remember if it killed the flame-thrower team or one of the US officers (commander or the FO) but once more under threat from another team that had wormed its way between the houses, once more engaged reverse and backed away at speed.  My own flame-thrower team were using it as cover and after leaping out of the way, managed to get a lick in before themselves being cut down by the Americans between the houses.

Out of two other squads in the northern part of town now blazing away, three very singed survivors, including the mortar observer, finally managed to get out and run to safety. They kept running actually as between them they had nearly 10 pin markers and not a hope of rallying.  At this point I had no one close to the objective, so desperate times called for desperate measures. The commanding leutnant charged across the open to the sandbags surrounding the ammo dump. The remaining squad, shamed by the leutnant's suicidal bravery, also charged across the open to the shelter of the sandbags.  The Americans opened up on them with everything they had, cutting down several Fallschirmjaeger.  The squad failed its morale twice - rallying and charging back in only to fail again and retreat back 12" to their start point.  

Last man standing - the German commanding officer shows 'em how its done!
This was Turn 6 and Doug's remaining paras still occupied the house next to the ammo dump objective.  German activation and the officer adding oak leaves to his Knight's Cross, charges back to the objective by himself, letting loose some SMG fire as he dives for cover.  American activation - they fire again at the lone German officer, who gets pinned (again) but somehow survives his morale.  Final activation - Germans open fire again - an entire squad with an LMG, SMG and assault rifle - on the US occupied house and manage to wipe out the remaining American (me rolling a D6 for a kill in the last dice of the game!)  The officer is the closest to the objective, so the Germans are deemed to have held onto it and scrape a win.

It was a really fun game and although the Americans suffered the heavier loses, the game went right down to the wire, with the German's only winning on the last roll of the dice!  I give a big two thumbs up for Bolt Action - its fast, furious (quite bloody) but heaps of fun as a WWII skirmish game.  A big thanks to Andrew who organised and umpired the game and Doug for the determined opposition and sumptuous venue - a nice table in a dry shed in the middle of a downpour!  I think we will be playing these rules again soon.

Cheers,
           Doc

Saturday, February 23, 2013

Polish Brigade Commander & ADC

A week or two ago I received two more of Paul Hick's beautiful Napoleonic Poles from Roger at 'Murrowski Miniatures'. These were the mounted general and his ADC - perfect for my brigade commander (and his ADC).  After finishing off my German para company I couldn't wait to paint them up. I also decided to do something a bit special with the basing to create a little Polish command vignette.  Ironically I had an MDF tea coaster that I'd cut down as a base for my 17thC Polish Commonwealth commander and escort (also mounted figures) which was both large enough and available as I have since re-based my TYW Polish commander.


I based the General's uniform loosely on that worn by Poniatowski, using a copy of a Belange print as a guide.  I've given him the almost purple (Carmin red?) trousers and tunic front, with everything edged in silver of course.  The horse leather is red, favoured by aristocratic Poles - probably the only one's who could afford it!


His ADC's uniform was a bit more problematic as the only authentic references to Polish ADC uniforms I could find were those attached to Poniatowski and all wore a hussar uniform with shako.  Fortunately there was no regulation and each commander could pretty well dress his staff to his own taste, so room for a wide variety.  A more junior rankede general like a brigade commander may well have a junior officer assigned to him, usually from one of the cavalry regiments.  In this case I think it looks like one of the elite Polish chasseur regiments.  I note he has his brevet rank appointment on his left arm (at least I think that's what it is!)


The general's grazing horse is a particularly nice pose you don't see that often so I've given him a nice tussock of grass to munch on!  I've chosen specific bits of battlefield detritus sprinkled across the base.  There's an Austrian leather helmet, a Russian grenadiers shako, backpack, cartridge box and musket.  The grenadier shako came off a plastic Warlord Russian head, with a chin-strap added and hollowed out a bit.  Gotta love those plastic bits and pieces!  Getting a very useful collection of them for all sorts of things - from a German Fallschirmjaeger armoured car commander to a Russian shako or an old musket - there are never-ending uses to be found with my plastic bits and pieces box.


The general is a superb figure, with exquisite detailing.  Unfortunately the horse's saddle cloth does not have the detail on one side but it's nothing that a lick of paint couldn't fix! Nonetheless these figures were a joy to paint - I must get on with finishing the rest of the brigade including the artillery battery.

Cheers,
            Doc

Sunday, February 17, 2013

Fallschirmjaeger... and an Autoblinda!

I know it sounds a bit like an Italian espresso coffee machine but its actually an armoured car.  The Italian's tanks may have been crap but some of their armoured vehicles were not and among the best of them (maybe  equipped with an espresso!) and used exclusively by the Germans during the war - was the four wheeled Autoblinda AB 43.   The crazy-quilt camouflage pattern was a bit of a painting challenge but I quite liked the end result.  Its an Italeri model at 1:48 scale - or so the box tells me (looks a tad on the smaller side of 1:48 to me - more like 1:56!)  It had also sat on my shelf for a long time so that after the relative success of making my Hanomag kit, I decided to give the Autoblinda a go.


It was also an expensive little sod at nearly $28 AUS (or $29 US!) but a beautifully made little model that was nonetheless relatively easy to put together.  The model is hard HD plastic with a metal chassis frame that screws in to the plastic hull.  It actually fits together really well - nearly as good as the Tamiya Hanomag - so its a quality model which at the end of the day is what you are paying for.


The reason I bought it was the fact I wanted some unique armour for my German paras and this was one they operated exclusively in the Mediterranean theatre.  A bit too late for my Crete Op MERCURE Fallschirmjaeger company but a really nice bit of kit nonetheless.  It was a fiddly bloody thing to build though - every hook, bolt, aerial and minute thingamebob had to be glued on.  Much bad language ensued at times but it is an amazingly detailed model.


The Autoblinda mounted two machine guns (one in the turret and the other rearward facing) and a 20mm Breda 35 gun.  By the time they were ready to roll off the production line in late 1943 the Germans had taken over all the Italian armaments industry and distributed the Autoblinda to their units in the north of Italy.  The Autoblinda I've made belongs to the 4th Fallschirmjaeger Division based in Florence in August 1944, at which time they were mainly used in policing and anti-partisan operations.  The only thing I have added to the model is a Fallschirmjaeger NCO in fliegermutze as the car commander.  I made him from a small 25mm (large 20mm) plastic German, slicing and dicing to get the pose I wanted that fit in the open hatch turret.


In addition to the Autoblinda  I also finished off my para company with my Kettenkrad scouting unit, anti-tank gun and a few other odds and sods.  Most are Bolt Action figures and very nice when made up but I have to say the Kettenkrad (the German halftrack motorcycle thingys) were an absolute pain to put together.  Do you think I could make the handlebars stay in place or fit the riders into their slot in front without major surgery?  Still, once based up they look great and just the thing for any forthcoming Crete campaign action.


Robust machines, the Kettenkrad could go just about anywhere (although not quietly I'm thinking!) which made them useful scout vehicles but they also had enough grunt to tow anti-tank guns etc.  Dunno if I'd like to be a passenger on one, facing the wrong way and so blissfully unaware of what you could be riding into!


One of the specialty figures I got was one of the feared Flamenwerfer.  I was impressed with it's deadly performance in our Corinth Canal re-fight and thought at the time 'I gotta get me one of those!'


The Warlord Bolt Action figure is a particularly nice one and came with another nice squatting sniper one. I've got him squatting behind a rock, something I'm sure many paras did during the Crete campaign! I used a piece of cork for my rocky outcrop.


I also picked up the paras-with-captured-weapons set and got a couple of useful figures out of it, including a chappie with a captured Sten hurling potato-masher grenades - I've given him a few more to hurl as well!  The other one is standing firing an automatic rifle of some sort.  Again, nice figure and rounds out one of my two jaeger platoons.


Last but not least is my anti-tank gun and crew.  Its the paras 2.8cm squeezebore gun and a very nice little model with figures actually looking like they are properly handling the gun, with the Gefrieter in charge watching the result through binoculars.  Again a nice little unit that rounds out my HQ Support (Heavy Weapons) Section.


Well, that should be the last of my German paras done.  Next on the acquisition list is the same in Gebirgsjaeger (Mountain Troops) which are a little more problematic as I've only just found someone who makes reasonable figures, although I'm informed by our Warlord agent that Bolt Action will be bringing some out later this year.  That and a 1:72nd scale JU52 tri-motor transport will finish my little army ready for our Crete campaign later this year. The next lot to be painted up will probably be Napoleonic - I'm thinking the Polish general and ADC for starters.  But we'll see - there's 'undreds of the buggers awaiting my attention with the brush!

Cheers,
            Doc

Friday, February 8, 2013

Napoleonic Poles - 1st Regt of the Vistula and a Hanomag!

The 1st Regiment of the Vistula Legion
After the rather lengthy hiatus with Cancon, the preparations for Cancon and the entire Franco-Prussian War demo game thing, other projects like my Poles progressed by fits and starts at best so the first thing I did after Cancon was finish the 2nd Bttn of the 1st Vistula Regiment (or rather 1st Regiment of the Vistula Legion).  These of course are the beautiful Paul Hicks sculpted Poles I got from Roger Murrow ('Murrowski Miniatures' for this venture!)  They confirmed in my mind that Hicks is one of the finest figure sculptors working in the UK at present - his figures rival those of the Perrys (I'm thinking of Alan Perry's Napoleonic figure range in particular).  I note also that Nic of Eureka Miniatures is now also casting and supplying some of the Paul Hicks Poles here in Australia.

1st Regt of the Vistula Legion in attack column
Command of the 2nd Battalion
Detail, 2nd bttn command stand 
Voltigeur companies
Grenadier companies
Detail, rear of 1st Regiment
Tete d'colon 1st Regiment
1st Regiment, march column
Its great to finish the regiment but the project calls for a full brigade with accompanying artillery battery. Roger recently sent the figures I needed for the second regiment and a three gun battery, with a mounted brigade general and ADC to come.  Plenty more to do!

The other thing I just finished was a bit out of left field.  Just before Cancon the good folk at War and Peace Games sent me some bits and pieces I needed to finish (sort of) my German paras, namely a pair of Kettenrads, anti-tank gun, flamenwerfer etc, etc. After starting putting these together I noticed amongst my WWII German stuff was a Tamiya 1/48 scale Hanomag half-track model that had been sitting on the shelf for well over a year.  I had two half-tracks but was having the devil of a time matching them with a third vehicle for a full squad.  The equivalent such as that produced by Warlord is actually 1/56 scale - way too small for the ones I had, as I discovered after buying what I thought was a matching model.  By sheer luck I happened on a 1/48th scale model in a hobby shop that usually only stocks either 1/72nd or 1/35 models.  Just the one but exactly what I was after - expensive little bugger too - but I thought 'how hard could it be?'  Well, once I decided to make it I was gobsmacked at the amazing detail in the model.  My hat goes off to model makers as this one really tested my very, very rusty model-making skills. 

The Tamiya model contains fantastic detail
The Tamiya model is the same size but appears to be a different vehicle make
The finished model!
The half-tracks were known as 'Hanomags' for the very good reason of it taking too long to pronounce the full title: Mtl.SPW.Sd.Kfz. 251/1 Ausf. D.  Interestingly, the differences between the Tamiya model and my others are noticeable - particularly at the back. The model info tells me that the final version of the Ausf. D was made in 1943 to include fewer panels - thus making it easier to manufacture.  That and the air intake at the front being located under the armoured panels rather than on top have me thinking its the later version.  A minor annoyance given the earlier versions I already have but that said, I'm quite happy with the way it turned out.  Room for 12 men and their kit (very squeezy in there tho) and two MGs for a bit of added firepower.  

Rear of the Ausf. D - note the green case hanging on the back side panel - its full of grenades!  That and the Jerrycan on the other side would be great targets!  I'm sure they removed them going into action.
More rear detail of the Ausf. D 
Well that was certainly a diverse two weeks - also done was the building and base coating of about 150 Perry's and Warlord Austrians and Russians.  The new Perry's plastic Austrians are fantastic.  The detail is amazing - as sharp as the Tamiya model I just built - but mercifully a helluva lot easier to put together! The only disappointing aspect was the Warlord plastic Russians that come with a metal command.  The plastic figures are OK and easy to assemble but the metal ones are pretty ordinary and badly cast.  The officer figure is animated but in an awkward pose that does not match that of the marching flag bearer's and drummer.  But that is all by-the-by as I now have over 200 figures base-coated on painting sticks awaiting me!  And its back to work Monday...  [sigh]  I guess I'll just have to retire to get them done!

Cheers,
           Doc