Showing posts with label ACW. Show all posts

Wednesday, October 17, 2012

ANTIETAM CAMPAIGN: BATTLE AT CRAMPTON'S GAP, SOUTH MOUNTAIN

Last weekend our group (Ian, Cameron and Greg on the Union side, myself and Stuart on the Reb - commander Doug away on family duties!) fought the third of the battles in the series of encounters in the Antietam campaign in which Meade tried to destroy Lee's army piecemeal by forcing a way through the mountain passes and catching Lee before he could assemble the Army of North Virginia.

Situation at beginning of turn 3 with Cameron's Union forces coming on in march column on the Rebel left (photo by Greg)

The other half of Cobb's rifle armed Georgians have just made the crest of the hill in the middle to add their much needed firepower to the center of the Reb position. Note the gallant cav commander (Munford) charging madly down the slope - out of command of all his forces save the horse artillery for almost the entire game! ( photo by Greg)

Crampton's Gap was vital to Stonewall Jackson's forces who held the nearby Harper's Ferry so McClelland had been dispatched to force a passage at the third of the mountain passes at all costs.  The Union forces arrived late afternoon, just beaten in the nick of time (arriving a little over an hour earlier) by a small but determined Confederate force composed of McLaws and Anderson's under-strength divisions, and Robertson's tiny Brigade of Stuart's cavalry division for a total of 67 stands (five cavalry), all part of Longstreet's wing of the Army of Northern Virginia.  The Union forces were two full-strength divisions of five complete brigades under MacClelland. The Union forces were able to bring on in total nearly 200 stands - 111 in the 1st Division, with 83 stands in the 2nd Division (we actually ran out of stands of Bluebellies trying to field this force!) 

The 24th Georgia and the 12th Virginia cav (a whole 2 stands!) bring a Union regiment to a grinding halt.  They were close enough (just) to be in range of the cav's pathetic shotguns and pistols.  They managed to disorder them and take a stand in their first round of shooting.  They later turned sideways and enfiladed one of Cameron's regiments with their shotties and taking another stand before eventually going down fightin' ! Yeehaa - that's mah boys!!! (Photo by Greg)

The only advantage the Confederates enjoyed at the start was in five artillery batteries present, one of them light horse artillery, represented on the table with seven guns (although with an organisational stuff-up at the start, we ended up fielding only six guns).  The Union only had one battery of four guns (coming on in turn 5).  The scenario was comprised of 9 turns, with turns 7 - 9 being night actions.

Ian's men continue to pour into the middle, reinforcing the Union firing line.  One lot would be whittled down only to be replaced by another. Some of Greg's beautifully painted figures (photo by Greg)

The scene was set for a pretty desperate fight.

Complicating matters for the Confederacy was the fact that less than half the force was in position at the start of the game, with the rest not coming on until turn 5.  This was a grand total of 27 stands of infantry, five of cavalry and four guns spread across the table to represent the way they arrived historically - in drips and drabs - and all over the place, so that many units like the cav were out of command - another distinct disadvantage.

Lookin' down the gun-barrel in the center - Chews Horse Artillery and Grimes Portsmouth (Va) Heavy howitzer get into action at the Union forces always threatening to flank our dwindling forces to the left of the turnpike (and yes, its actually one of my photos this time!)

Union forces advancing on them initially were Newton's Bde (minus 8 stands of the 69th Pennsylannia Zouaves - a total of 23 stands) followed on turn 2 by Bartlett's Bde (a further 40 stands).  On turn 4 by Brookes (43 stands) & Torbert's Bdes (plus the 69th Penn. - 47 stands).  Irwin's Bde (a further 40 stands!) came on with the artillery (4 x guns) on turn 5, same time as the other half of the Reb force.  This meant that by turn 2 the Confederates were outnumbered 2 to 1 and by turn 5 nearly 10 to 1!

Another shot of the action in the center.  Although it shows plenty of firing from the Reb position, the Union troops actually stopped just outside smoothbore musket range and steadily reduced the Rebs without taking many shooting casualties themselves, with the exception of that from the Reb artillery fire.

Not only that the main Union thrust came first against the centre then left of the Reb line, thinly held by the 24th Georgia (7 stands) and 12th Virginia (cavalry - 2 stands!) on the left and Anderson's Bde (6th, 12 & 16th Virginia - 11 stands) - all save the 24th armed with only smoothbore muskets against the Union rifles.  As you can imagine it got pretty ugly for the Rebs right from the start as the Union troops very un-historically stopped outside of musket range and  started to whittle down the Rebs opposite from the outset - very unsporting!

But the Union did not have it all there own way - the Rebs artillery battery on the far right fired at long range and started to take stands off the Union ranks right from the start.  By turn 2 the second battery set up on a hill in the centre looking straight down the turnpike and began blazing away the the massed Bluecoats, adding to the casualty toll. The Rebs were also saved by the Union commander Ian having an appalling run with the shooting dice, otherwise they would have been wiped out before another of the rifle-armed Georgian regiments arrived to help relieve the pressure.

Reinforced and now at close range, the Union troops overwhelming firepower rapidly reduced the valiant but outnumbered Virginians holding the Reb center.

While all this was going on, and frustrated by the total lack of action on the right (the Union forces opposite didn't get to come on until turn 4), on turn 3 (a turn too late as it turned out) the other regiment (2nd Virginia) of the tiny cavalry force made what looked like a suicidal move - mounting up and trying to ride around the back of the Union troops in the center in a daring raid, aiming to take out the ammunition wagon.  Like I said, it was a bold move and had it been made a turn earlier, it may well have succeeded (OK - like a good Reb cavalryman I had a rush of blood to the head!) but pulled up about 3/4s of a move short of the intended target and had to about turn and skedaddle as Greg's blue horde came on.

The mad Virginian cavalry attempt a Jeb Stuart style ride  around the back of the Union position (that juicy ammo wagon was sooo tantalizingly close!)  Predictably, it ended in tears.

Interestingly, this mad maneuver may have well saved our bacon as Greg tried too shoot them down, rather than go hell-for-leather at our vulnerable right, manned by only the 16th Georgia (7 stands of smoothbores) and the gun batteries of Hamilton's divisional artillery (2 light smoothbore & 2 light rifled), the latter of which found themselves once more in a target-rich environment!

Greg's Union horde finally get to come on in turn 4.  Note Reb cavalry have skedaddled just ahead of the blue tsunami (photo by Greg)

And the view from Hamilton's guns on the ridge opposite.  A target-rich environment indeed!  Note that the two surviving stands of cavalry have joined the Georgians behind the stone wall to the left, to add their feeble pop-guns to the Reb firepower! ! ! (photo by Greg) 

The situation at turn 5 - the shrinking Reb force is seriously outnumbered but reinforcements (at top right) can be seen arriving just in time to stem the Union attempt to turn our left (photo by Greg)

Cobb's Georgia Legion arrive in the nick of time to steady the wavering Rebel lines (photo by Greg)

The madness was contagious as on the Union right Cameron launched two of his regiments in march column straight at the last line of Reb's defending the road leading to the key position (and Union objective) of Wise's farm.  Had the Union found a way and forced their way through it would have been all over for the Confederacy as that road was also the one through which all our meager reinforcements were funneled.  It was a moment reminiscent more of the French on the Peninsular - and they were beaten off by the Georgians in much the same way.

I think its the 9th Carolina of Cobb's Bde giving a very Wellington-esque greeting to the Union columns trying a very French 'cold steel' to dislodge them. In truth it was a gamble by Cameron that nearly came off.  If we hadn't rolled well on our shooting we would have been in all kinds of bother (photo by Greg, modified a bit by me)

The last phases of the game - turns 6 to 9 were mostly Union attempts to turn our right or finally punch through our center before night fell and brought a halt to the fighting.  In the turns conducted in the failing light all suffered from half effect on any shooting.  But not before the Reb horse artillery and heavy howitzer in the middle (the only survivors of the Virginian cavalry brigade as it turned out!) got some great shooting on the arriving Union artillery, destroying one gun and limber, damaging another and taking it out of the game and silencing the battery for one turn in three rounds of shooting - not bad going at all.  Just as well as the Union guns, combine with Greg's massed rifles managed to also silence Hamiltion's guns on our right and take one of them out too.

The fighting in the center turn 8 - the Georgians have withdrawn from the crest of the hill as the last of the Virginians of Mahone's Brigade are overrun in front.  Note the rest of Cobb's Bde firmly hold the left and the Virginian artillery kept firing until the last minute.

More of the desperate and confused fighting in the center as night fell and the lead Reb units attempt a fighting withdrawal.

A massive volley from Greg's men on the right finally put paid to the Georgians and Virginian cavalry - just as well as they promptly ran out of ammo doing it! Note the artillery are long gone, after getting a few more hits on the massed Union troops now curling around the Reb right flank - all too late as it was 'lights out folks'.

At the start of the night turns (7 to 9) the casualties were about even but the fighting actually became more confusing (just the way it did historically) and I lost count.  I got the impression that the Rebs had inflicted more on the Union in the final turns as our rifle armed units got more into the action but I could be wrong as we literally had to sacrifice the entire of Mahone's Bde (Anderson's Division) as well as our cavalry and some of Cobb's Brigade to hold up the Union forces and prevent them from forcing their way through the gap or rolling up our lines.  We were also able to get all our guns away which was a real bonus.

I have to thank all the boys for a great game including acting Reb commander Stuart who tolerated my annoyingly unhinged use of popgun armed cavalry with good humour and Andrew for once again meticulously putting together yet another exciting scenario to fight. Thanks also go to Ian who, although a damned Yankee, organised our new venue at the Lanyon Vikings Sports Club, complete with acres of room, luncheon servery and wet bar (what more could a hungry thirsty gamer want I ask?)  Finally my thanks once more to the talented Greg who took the lion's share of better photos and was good enough to send them to me for posting on the blog.

Next battle will be WWII - the Greek campaign involving my newly painted Fallschirmjaeger attempting to seize a bridge over the Corinth canal in a few weeks time.  Until then its adios amigos from Doc.


Monday, September 24, 2012

Let the Antietam Campaign roll on - Doc's Confederates finished (almost)

Well, wouldn't you know it - after having a less than successful run at the last encounter, it seems I am still well and truly bitten by the ACW bug because I've been furiously painting and collecting ever since.  I've got the WWII Greece/Crete campaign project and another company of German paras (das ist Fallschirmjaeger miene Herr!) to finish plus my brigade of FPW Wurttemburgers, now the last packs from Foundry have arrived.  Then there's some more French line and I don't even want to think about my Bavarian regiment!  Oh yeh, there's still the Poles to do and more French AND Perry's are releasing plastic Austrians which I will now have to have...  the fun never ends!!!    So what did I do?  I did what any lunatic wargamer would do - start another project!  At least this time I can say I've also finished it...  sort of.  You see I just got my Sash&Sabre artillery limbers and dismounted cavalry and...  well, you get the picture.  More lead to paint up!  Anyway, I've finished most of my Rebs, starting with the cavalry.

Reb cavalry take the field - huzzah boys!

Now I'm not sure of the make - they could be Redoubt - the figures aren't bad and the horses very good indeed, nicely proportioned sculpts.  One criticism - very skinny gun barrels on their shotguns which threaten to become sawn-offs every time they are bent.


The officer figure is of course a Perrys from their Confederate Brigade commanders set.  Fits in rather well with the others, whatever make they are.


The scenario for the next battle has just been released - the third of the battles for the mountain passes - this time Crampton's Gap.  Although we aren't actually gaming for a few weeks, amongst the Confederate forces named at the battle are the redoubtable Cobb's Georgia Legion.  By happy coincidence that happens to be in my most recently painted units!  The 'Georgia Grays' are a rather nice looking unit, which I have actually found the flag they carried and made it up with my graphics program.  See what you think.


What a grand old flag with the very biblical 'The God of Jacob is With Us'  emblazoned on it.

Of course most will recognise the Perry's plastic 28s.  Two boxes worth to be precise has given me 34 stands (@ 3 figures each) of infantry, plus a few odds and sods such as another command stand still to be made up (into another Georgia regiment methinks).  I've made one regiment in hats, another in kepis and the other two mixed.  I confess that they are easier to paint up than most - although you have to have a bit of variation even with a basic uniform - maybe even more so with  your basic blue or gray.


 To add a bit more variation I've done a few basic conversions on some of the figures so I've got a different flag bearer or two and some are carrying muskets in different poses.  And the corporal below at the end of the line directing traffic.

Ahhh, the joys of plastics - slice 'n dice 'em as you please!


Well, that's enough from me for the moment.  Heaps more to show when I've done a few of the Sash&Sabre figures up - and I'll give a little critique as well.  And then there's the Battle of Crampton's Gap - against hordes and hordes of them thar Bluebellies!!!  Might jess sit down a spell fust and have a sip of ol' Jack Daniels before I give them fellers some cold steel.  Yeeehar!!!

Cheers,
            Doc Reb 

Saturday, September 15, 2012

ACW - the Antietam Campaign - second battle of Foxes Gap

We finally got to fight the second of our battles of the Antietam campaign using my portable game table 
(post back in May last year) at a mate's place - we took over Cam's lounge room for the occasion - a good if not snug fit with seven of us playing!  I completely forgot my camera to record proceedings but fortunately Bluebelly commanders Ian and Greg DID remember so all the pics are theirs - generously submitted to my blog, so at risk of consorting with the enemy - thanks guys!

Our table set-up - the Rebs converge along the roads closest and top right.

Dispositions at the start of the game

Due to the absence of one of our commanders, I got a changed command (at the last minute) from Drayton's Georgian & SC boys to Colquitt's Brigade (13th Alabama & Georgia Regts) of Hill's Division, which resulted in my coming in from the extreme left (along left hand road closest in above pic) in two separate groups. I also had one battery of guns which did some initial damage then promptly ran out of ammo on my first roll of the dice!  Unfortunately Doug also ran out of ammo in the initial turn which meant that I spent the rest of the game trying to get my battery close enough to the ammo wagon to replenish.  

Doug's position in the centre - note all the 'out of ammo' markers - the powder wagon is in the background behind the hill.  It took most of the game to get there, replenish the Reb's holding the hill, then get close enough to replenish my guns to the left (out of picture) who were then promptly masked by Doug's advancing troops!

And that was to be the tenor of most of my game - didn't get involved until the last two turns then couldn't turn their flank.  I really rolled like crap time and again - and that'll do it to ya every time!

Greg's Union troops from Wilcox's 1st Division line up along the fence

Both Ian and Greg played very coolly and were never in any real danger from us - as the casualties on the flank suggested at roughly half a dozen stands apiece.  Elsewhere on the table it was a different result - in favour of the Union almost from the start.

Andrew's Massachusett's boys line up on the left, with artillery pounding the centre of the Reb line.

Most of the action took place in the centre and left as Doug (senior Reb cmdr) took over Drayton's Bde holding the the farm in the middle of our lines and Stuart with Ripley and Anderson's Bdes did an ambitious sweep around the right to try and force the Union forces (two divisions worth!) back on themselves.  Andrew and Cameron's Union 1st and 2nd Brigades manfully held off Stuart's Reb onslaught, although we did score plenty of hits on the pesky Bluebelly gun battery and force it to skeedaddle!  

  The Union left comes under increasing pressure

The problem for the Confederates is that we were running out of time.  Union reinforcements were pouring in all the time while the additional Reb division (Hood's) was still miles away.  We had to try and force the Union forces back before we were outnumbered and forced to retreat ourselves.


Stuart really gave it a good shot and came mighty close but in the end couldn't break through.  The steady stream of Union troops reinforcing their lines meant that once the steam went out of the Reb assault, we were faced with annihilation if we had persisted as the odds turned decisively against the Confederates.

Cameron's Bluebellies just manage to hold off a desperate Reb assault as more reinforcements arrive in the nick of time. 
Note that Union battery in full 'skeedaddle' mode down the turnpike behind them!

In the end the odds became just too great - some of those Union regiments had as many as 20 stands!

Titanic and desperate struggle on the centre/left

Doug and I tried to do the same thing on the Union right flank but couldn't quite bring it off.  Only time so far the rules let us down as there was no way I could engage all our attacking units (the one behind above) - had I been able to do so it would have been quite a different story but - ca la guerre!
Da boyz  at the end of the battle - victorious Union (save Greg who took the pic) and not-so-victorious Rebs.  

The Rebs sensibly decided to call it quits and withdraw after the attempt to turn the other Union flank failed. We lost about twice that of the Union forces which would have been OK had we have broken them but we narrowly failed - twice.  Hood's reinforcements would not have reached us in time. Andrew tells me that historically the Rebs got a real drubbing in this initial encounter - so we did well in comparison (cold comfort).

Thanks to Andrew for devising the campaign scenario and Cameron for kindly lending us his lounge room as a battlefield for a day! (Nice venue Cam!) and all for a congenial and fun afternoon.  Will keep you all posted with our future battles - and will remember to bring my bloody camera next time!

Cheers,
            Doc

Sunday, August 26, 2012

American Civil War Rebs or Zouaves (and friends) redux!

Could not resist it.  Had a stack of photos that turned out well (for me that is - usually I ditch most of them) and being a bit disappointed with my Foxes Gap battle shots, I thought I'd process a few more of my Reb brigade. Nothing special - just 'caus I could!  But I am chuffed about how the figures turned out - getting very enthusiastic about ACW again.

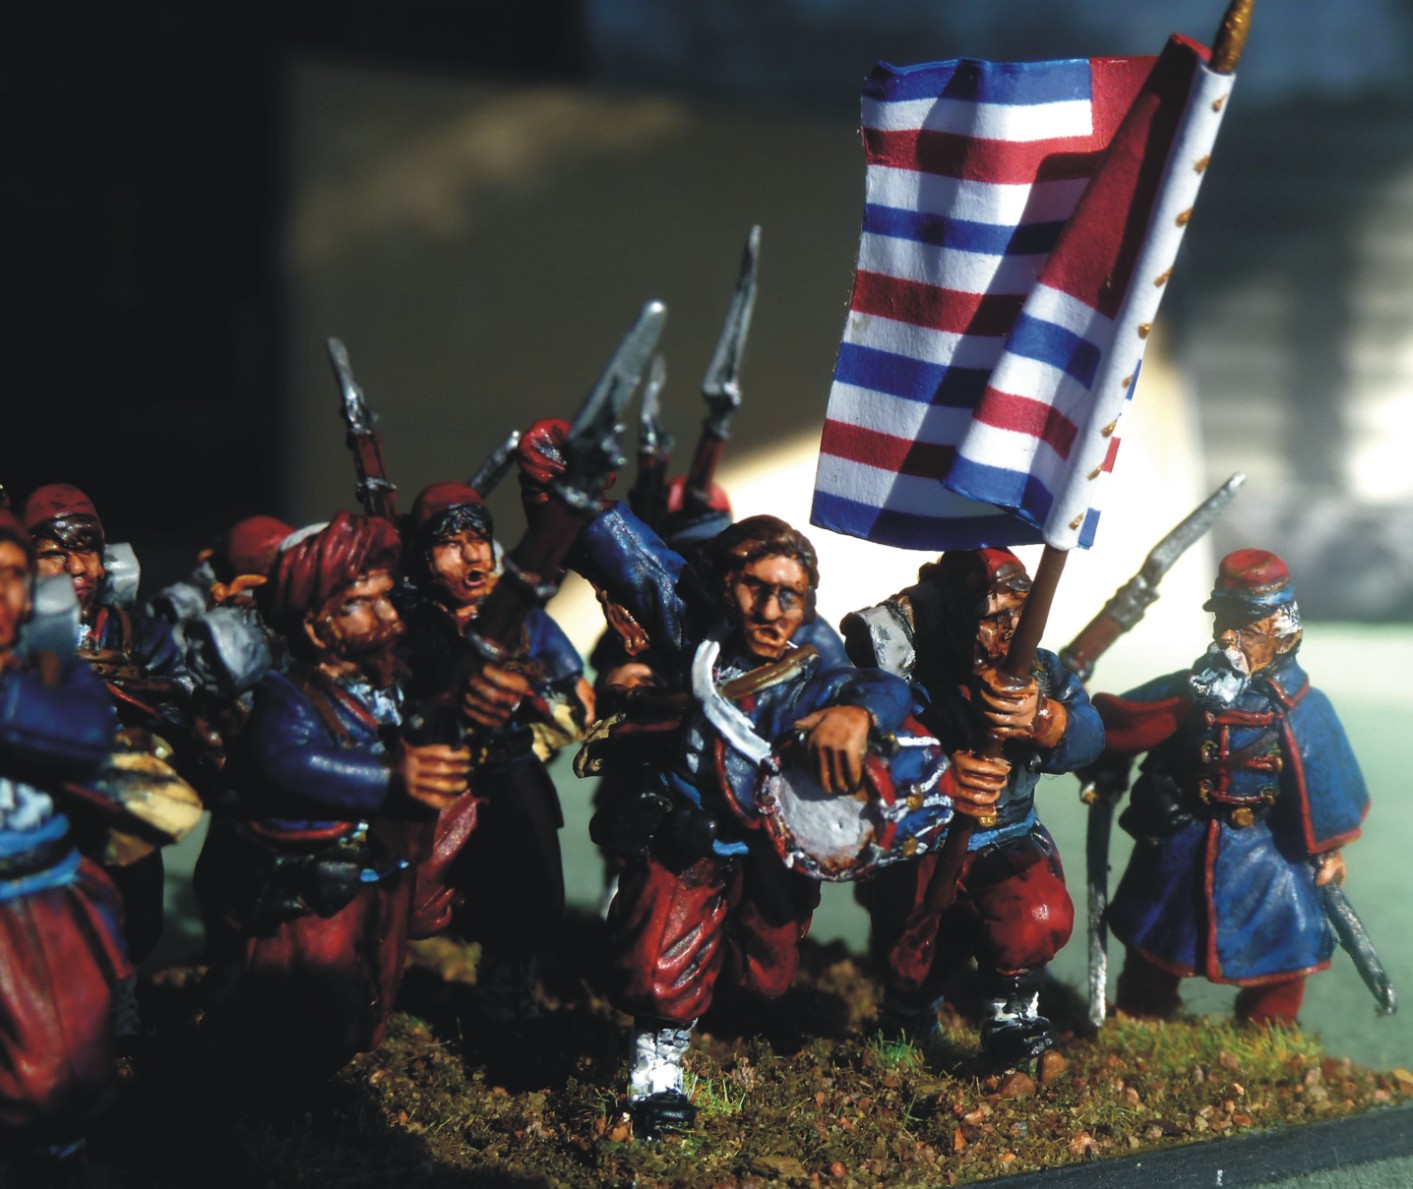
L'attaque des Zouaves

Wait for it... wait...  yep, I can feel another Perry's order comin' on! (OK - that was just for my fellow bloggers - do NOT tell She Who Must Be Obeyed - Minister for War and Finance who will likely remain unimpressed with my conspicuous purchases of yet more figures!)


Blame it on the Redoubt Zouaves I fixed up - if they hadn't turned out so well...  I love the detail on these figures, they are so well sculpted.  Second only to the VMI ones I already had.


What I've done with these photos is to add a few atmospherics to suggest battle - under hot Federal fire, the VMI boys go in! (Brave lads those!)


The figures in the front (Zouaves, gun & crew) are Redoubt, those behind are Perry's - mainly plastics from their ACW Infantry box (couldn't resist, had to buy another box to complete a second Confederate brigade!)

The other 'Brave Colonel' figure came from the Perry's Zouave Command sprue - the officer figure with a different head (Victrix?) - just to mix it up a bit as the Perry's plastics only have one officer pose, which is a bit boring.


In addition to the infantry I will have to do a cavalry unit up.  Twelve figures mounted (Perry's plastic set?) plus same dismounted skirmishing AND two sets of horse holders.  I think I have to order those as they appear very hard to come by in 28mm.  I need a similar set for my ECW dragoons too - ah, decisions, decisions!


And that's the last one - the three command figures are metals of different makes mixed in with stands of Perry's plastics.  The Dixon drummer has a head like a melon but apart from that they don't seem too odd. Apologies for my indulgence, particularly as I haven't been posting much recently.  Hopefully be able to get onto some other figures (like my long awaiting Poles!) soon.

Cheers,
            Doc

Sunday, August 19, 2012

ACW - the Antietam campaign & Doc's (new) Rebel Brigade

As is the usual way of things I was distracted by yet another part of the collect that demanded attention.  I did make a good start at the Poles but had also to finish of my FPW figures such as the Wurttembergers (done) and also paint up a regiment of French dragoons for a mate (and in part to pay off a lead debt).  No sooner that I had finished all this then the boys announced that they were going to do an ACW campaign using Fire & Fury rules.  So drop everything, we're doing the Antietam Campaign.

Well, turned up at the club and played the opening battle (Foxes Gap, South Mountain, 14 Sept 1862) with command of a Confederate Brigade. Once I got the hang on the rules, I had a great time fighting a real ding-dong battle on the right flank.  The matter was in doubt literally until the last turn when the Rebs pulled off a bit of a coup, stopping the much more numerous veteran Ohio Brigade (all Germans who spoke no English, so I'm told). Very unusually ( for a wargame) I actually captured an entire regiment of them after a very hard fight, so naturally I'm looking forward to the next round!

Photo: Greg Blake  The red dots are disordered markers. My beleaguered and outnumbered regiment on the extreme left was supported in the nick of time while the boys on the top of the hill got some good shooting in before charging them thar Blue-bellies and sweeping all before them - yeehaarrr!!!  

There were some really nice figures and a huuuuge table to cover.  Here are some of them photoed by one of the redoubtable Union commanders, Greg.  The end result of the opening encounter was a convincing Rebel win but we were hampered by running out of ammunition - the damned ammo wagon being miles away from where it was needed!  The Confederates are reinforced but so are the larger Union forces so the next battle will be even harder.
Photos: Greg Blake (Bluebelly commander!)
Naturally enough I thought it high time that I finished my own Rebel army.  It consisted of an artillery battery and a single battalion - the VMI boys that I first posted on over a year ago.  They needed to be re-based for the F&F rule system and the other figures I had painted or fixed up.  After about a fortnight's furious activity I have finally finished my Reb brigade consisting of four regiments (at 6 x 3 figure stands each) and the gun battery.
Doc's Rebel brigade
Other figures required were the mounted brigade commander, two 'brave Colonel' figures (that can be attached to regiments under my command and adds to their points)  and some casualty markers.  One of the pleasant discoveries when I dug all my ACW figures out was a regiment of  Zouaves.  These were three-piece Redoubt figures and are beautifully sculpted and animated figures.  They were in very poor condition being dreadfully knocked about and with bits missing (mostly bayonets) and chipped paint etc.  They were also painted up as a Union regiment so I set about turning them into Coppens Zouaves (Louisiana boys from New Orleans).

Coppen's Zouaves (eventually 1st Louisiana) and VMI cadets (integrated into the 5th Virginia?)

I chose these guys as every man and his dog has Wheat's Zouaves - the famous 'Louisiana Tigers'.  I also found out that Coppens Zouaves ended up being brigaded with the famous Stonewall brigade - along with the VMI boys - so as I already had the VMI 'regiment', I decided to create one of the few Confederate Zouave regiments.

The general says "Advance!" - & one of the VMI's famous 'Apostles'

I should have cut down the base sizes for the guns too but I couldn't bring myself to do it.  For only a few mil I would have ruined really nice basing and risked damaging some of those wonderful figures.  I decided to leave them as is.

I think the VMI cadets are Redoubt figures too (although I could stand corrected) - whatever the maker, they are wonderfully animated and varied figures - even the casualty marker!
VMI boys lead the way!

The rest of the figures are a mix of a few metals (like fat-headed Dixon figures) and plastic Perrys.  The plastics turn out quite well although because they are not as well defined as some metals like Redoubt, with my failing eyesight they are harder to paint up well. That is to say, you can still paint them up quite quickly to a reasonable standard, but I'm afraid really fine detailing is just a bit beyond me nowadays.  Too many figures to paint - too little time! (as usual)
Mainly Perry's plastics, conspicuously with men waving hats!

The rules we are using (Fire & Fury) require some really nice special figures - such as the 'brave Colonel' you can attach to your regiment to increase its combat value.  

I tried to create a Lewis Armistead type figure with his hat impaled on his sword to inspire his men to feats of insane bravery (much like Armistead himself at Gettysburg).  The Perry's officer figure is a bit of a 'stiff' pose unfortunately but being plastic, is readily adaptable.

One of four Reb command stands, this one a mix of Castaway (Aussie figures - this one a French FPW officer) Redoubt and (I think) Dixon - the melon-headed drummer!

Dagnabbit - durned bluebellies hit me in ma haid! Another of the Dixon melon-heads makes a cool casualty marker.


Nonetheless, my favourites are the Redoubt Zouaves.  They are beautifully made figures.  And large - it was quite a task to get them to fit the smaller (50x25mm) F&F bases.  But wow - even crowded they look even better!
According to my research, the Louisiana star and bars flag was the one they carried into combat
Hey, why should them Bluebellies get all the good flags?

No boys - go thattaway! The mounted Reb brigade commander

The Reb brigade commander came from the Perry's metal Confederate mounted generals pack. Nice figures and the horses are superbly sculpted but one of the best command figures is still the old VMI instructor directing the cadet gun crew.  

The good old Coppen's Zouaves really look the business - can't wait to get them into action! Check out that drummerboy - how keen is he?
The old officer's saying 'now boy jess calm down - yer supposed to beat that thing with the sticks not yer darn hat!

Well I hope this post makes up for my long absence from the blog.  Work and footy haven't given me a break for weeks but hopefully now I'll be able to get more done and post the results with a bit more regularity.  If I don't get the Poles done I'll hopefully be able to post part two of Foxes Gap in the Antietam campaign.

Interesting factoid - by the end of the campaign Coppen's Zouaves were reduced to about a dozen men fit for combat - from the 600 that marched out of New Orleans 18 months before!  They fought bravely but even with several reinforcements, never numbered more than 50-60 men for the remainder of the war.

Cheers,
            Doc