

1st and 2nd sections 1st platoon dig in and await the next assault
The Japs directly in front of us formed up for their next assault and every man who could get a bead on them let loose. Two things proved to be invaluable - the siting of the Vickers MG at the top of the track and the Papuan platoon who commander Doug (Templeton) decided to hold back in the jungle on the ridge. Historically the ferocity of the Jap naval bombardment and landing terrified the poor local Papuans who took to the bush to hide - including most of the PIB!
Holding them back at the ridge proved to be a very smart move as it gave them a chance to do what they actually do best - shooting. They may have been very poor infantry but were natural hunters and very good shots. Their shooting and the Vickers helped whittle the Japs down sufficiently to enable the 1st platoon out front to repel all but the final assaults that day. Had they have not done so, I reckon my position would have been overrun by about turn three.

The northern (Aussie) end of the table, looking across. The Papuan militia are in the jungle closest. The picture was taken before the final turns of the day: the Vickers came under accurate mortar fire and the remnants of the 1st platoon & mortar section are sheltering in the jungle to the other side of the MG position. Last assault of the day is going in on the 2nd platoon on the far side of the table.

The southern (Japanese) end of the table at the final turns of the day. The remnants of 1st platoon have been pulled back over the river and the Japanese are just about to launch their final assaults for the day on 2nd platoon dug in on the slope on the other side of the river. The river like the creek is shallow and no impediment to the Japanese movement!
The assaults on the 1st platoon were continuous and both squads were subjected to an endless barrage of increasingly accurate mortar and MG fire. Unlike the clear field of fire enjoyed by the 1st section, the 2nd faced some light jungle which provided open cover for the Japs to approach much closer. Desperate shooting mowed down the first Jap squad but was not as successful against the second, only inflicting about 30-40% casualties!

In between assaults the 1st section came under sustained and heavy mortar fire
The Japs did their 'gut check', decided to ignore the heavy casualties and BANZAIIIII!!!

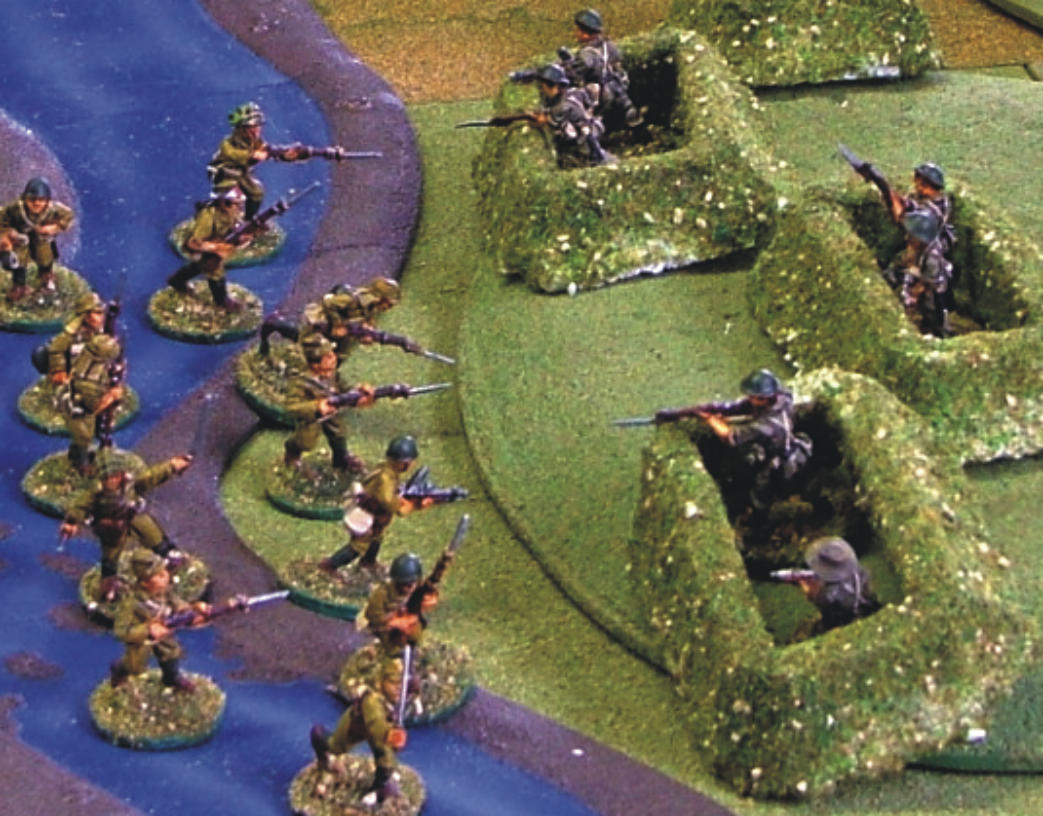
Light cover afforded by the jungle enabled the Japs to get much closer to 2nd section
The Japanese ran straight at 2nd section's position. You have a choice - bug out immediately or snap shoot and hope you get most of them before they get you. I decided on the shooting option. Half the remaining Japs were gunned down but at the crucial moment, the damned Lewis gun jammed - didn't get a shot off! Enough Japs survived to go one on one with the Aussies in their foxholes. A desperate hand-to-hand ensued where the remaining Japs were finally wiped out. But the damage was done. Only two men remained of 2nd section.

Aftermath of the assault on 1st platoon. After loosing nearly half their men, 1st section is rallied by their officer in the cover of the jungle after mortar fire virtually obliterated their position. The two survivors of 2nd section in their foxholes after beating off a frenzied banzai charge await the next pasting from Jap mortars and machine guns.
Once the bayonet fight was over, the mortar and MG fire resumed, killing the corporal which left the hapless Lewis gunner. He had no choice but to try and make back over the river to 2nd platoon's position. Halfway across - CRACK! - a Jap sniper took him out. 2nd section destroyed to a man in two turns. The clapped out but invaluable (when working) Lewis gun ended up at the bottom of the river. Damn!
The 1st section fared a little better, having failed their gut check twice and getting pinned in their positions, getting hammered by Jap mortars and then making a strategic sprint to the cover of the jungle where their officer and sergeant 'persuaded' them to hold before withdrawing over the river to the safety of the jungle on the other side. Actually we just wanted to make sure we saved the SMGs and Bren! Again accurate firing from the Papuans and Vickers MG kept the Japs at bay and enabled the remnants of 1st platoon to withdraw safely.


As can be seen above, the Australians were forced to withdraw to the other side of the river, preparing themselves for a final stand! They didn't have long to wait before the next wave of Jap assaults went in.

After wiping out another two squads of Japs the third managed to close with 2nd platoon in what was to be the last Banzai attack of the day. Fortunately for 2nd platoon their shooting was accurate, aided by enfilading fire from the ever faithful Vickers, who had been manned by PIB after the crew were killed by increasingly accurate mortar fire - mercifully the Japs only managed to zero in for the last few turns of the game.
At this point Jap commander Cameron announced that frontal assaults on the Aussies had been halted as a battalion was now in the process of outflanking the Australian position. Templeton and his men are now in real danger of being completely cut off from 39 Battalion at Kokoda. Will the Aussies manage to get out of it? The next scenario/battle to decide this will be held in about a month's time.
Cheers,
Doc
Keep these great reports coming Doc.
ReplyDeleteGreat looking game Doc, superb terrain and figures.
ReplyDeleteLee.
We ended up killing 100+ Japanese troops for the loss of 17 of our own (+ 3 SMGs & a Lewis gun) which was about twice the historical losses in the 1st encounter battle. But we actually tried to stall them - and nearly got overrun in the process and could have quite easily have lost the entire platoon and more, so not too bad a result. The problem is we are outnumbered nearly 10 to 1 - although the longer the campaign goes on, the better the odds. What I didn't mention in the AAR is the Jap snipers. They were a real pain and killed two men - one of them carrying a Lewis gun, which we could ill afford to loose. I think the next battles will be even tougher (just as it was at the real Kokoda). I'm really looking forward to it - & how good is that terrain eh?
ReplyDeleteGreat report. Felt like I was really there, desperately trying to hold the line against the Japanese onslaught.
ReplyDeleteScullmeister
Nice work Doc, you've won me over.
ReplyDeleteGreat stuff, I can not believe I have to wait a month to see the next installment.
ReplyDeleteJohn
Great report Doc. Fab photos too.
ReplyDeleteCheers,
Helen
No Matt - it was BANZAIIIIII!!!!! - and they didn't all die! In most of those types of attacks, up until Kokoda, the Japanese usually overran the enemy position - the opposition either running or dying! What's amazing is that barely trained and totally inexperienced Aussie militia - all the regulars were in Egypt - held their nerve, time and again. The 39th Bttn was decimated at Kokoda - but we haven't even got to that part yet in our gaming!
ReplyDeleteUnfortunately Andrew, the founder of our little group & who made all the wonderful scenery and owns most of the figures (and writes the scenarios!) is going overseas. He won't be back for a few weeks so we just have to wait for a month before we can continue the campaign.
But fear not - there'll be plenty of more postings on Kokoda!
Cheers,
Doc
Hi
ReplyDeleteNot my era but it was a great AAR!
Regards
Rafa
For those awaiting more action. You are in luck. The Australian commander while asembling his forces for the defence of Kokoda has send out a scouting patroll just to the East of the Village on the Kokoda/Oivi road.
ReplyDeleteAt 10.00am on the 28th of July, a day after the first action and in pouring rain the patrol spots what could be more Australian or Papuan's or maybe even Japanese advance forces.
The patrol moves forward cautiously
Andrew
Didn't manage to make the game (hence the lack of new post) I'm told that the Aussie patrol may have been cautious but in the pouring rain managed to run into a large force of Japanese. One of the sections sent on patrol was wiped out. Andrew informs me that this will change the OOB for the forthcoming battle for the Kokoda airfield. The next fight is shaping up into a much tougher battle, which I am looking forward to.
ReplyDeleteMy latest painting has been a platoon of Fallschirmjager (German paras) for the Crete campaign, which are nearly finished and will post soon.
Cheers,
Doc