Showing posts with label North Africa. Show all posts

Friday, January 6, 2017

Doc's WWII collection: this time fun with the Aussies

In addition to the Italians (and a smattering of Germans) I have built up a company sized force of Australians representing (mainly) the famed 2/7th.  These guys saw extensive action from the initial assault against the Italians in Libya (the 'Bardia races'), the Vichy French in Syria, the Germans in Greece and on Crete and again in North Africa up until and including el Alamein.  They were then withdrawn to defend Australia against the Japanese in 1942 and ended up covering themselves in more glory on the infamous Kokoda Track where they helped defeat an elite Japanese force that came within an inch of taking Papua New Guinea.  Very worthy unit to recreate for their early war period, particularly my Greece and Crete campaign.

The armour is mainly British but includes a couple of 7 Div Honeys. For air support they have a Blenheim fighter bomber, a Gloster Gladiator and a Hawker Hurricane (I have a Kittyhawk fighter and a Swordfish torpedo bomber still in the works!)  All of these aircraft are in the colours of the Greece campaign (and North Africa). As before, the collection followed by a few action vignettes.


The Allies thus far.

The guns including 2 x 2 pdr ATs (1 x Portee - a beautiful Blitzkrieg/Perrys model), 25pdr & Quad (another Perrys) and the @#$%Bofors AA (unknown E. European make and a 'challenge' to make - Perrys crew)

1st Platoon 2/7th consisting of 3 x 10 man sections & 1 x 8 man section, Headquarters section and supports. The ten man sections each have 1 NCO (Thompson SMG) and six rifles, 1 x VB (rifle grenade) and one Bren LMG team. The 8 man section (which can be attached to HQ section) consists of 5 rifles & a Bren LMG team under an SMG armed NCO. HQ has officer (1st Lt.), radio and two NCOs (SMG) (or runner and sergeant) with attached supports of a Boyes AT rifle team and 2" mortar team. Other supports are a Vickers HMG and a 3" medium mortar. 2nd platoon is same set up as 1st but under a 2nd Lt.

HQ Company (sort of) with officer (Captain), WO and Sergeant with 2" mortar team, Boyes AT rifle team, Forward Observer and runner. Supporting are the Bren section and 2pdr AT guns (and an ancient Morris truck as I don't have a Bedford!)

The Allied armour including 3 x Stuart Honeys (two Australian - Shapeways models - and one Company B)  The 2 x Vickers light tanks are Perrys/Blitzkrieg. The Herrington AC is of unknown origin (picked up for $10 at the club's bring&buy).  In the back are a Crusader Mk. 1 (Blacktree Designs?) and two beautiful Perrys/Blitzkrieg Matilda heavy inf. tanks. There is another Crusader (Mk.2) and a Staghorn AV scout still 'in the works'.

Aussie Honey and Bren squad on patrol.

Perrys 25pdr and Morris Quad in action.

Light scout recon in action.

Honey hit!

Their German counterpart KFZ 221 squad to go with my Ramke Brigade para platoon together with a STuG Assault Gun (still in the works).  They are my only planned North Africa Germans (i.e. DAK) as they can also be later war Mediterranean theatre.  They can also be teamed with the Italian 'Folgore' ('Lightning') Div Parachutisti platoon - when I get around to painting them too!
They'll make great targets for the 2pdr AT guns!

If the RAF doesn't get 'em first!

Hope you enjoyed this last bit of Doc's WWII desert whimsy. Normal service will be resumed shortly - the next post will be an actual game or some even more sensible Napoleonics or something.

Saturday, December 12, 2015

More of Doc's WWII AVs

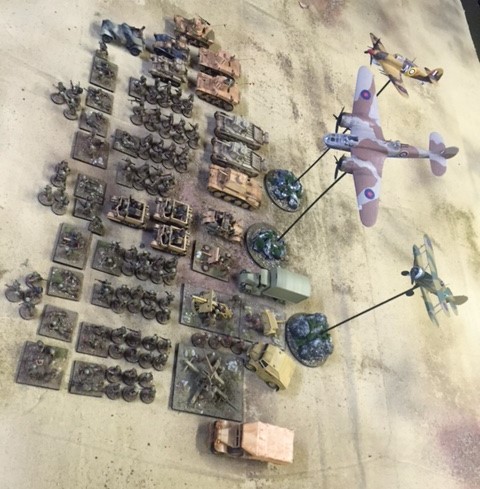
Once you get bitten by the WWII AFV bug, you really get bitten! Or at least I do! After the last post on my WWII Italians and the glorious Perry's Portee model, I just had to finish off the rest of the Italian AVs, then when I did that well, those three Stuart Honey's I had needed doing too... and to finish up I added a crew to the Bofors.

First up, the Italians. These were amongst the models I got for bit-more-than-a-song from a local hobbyist that threw in the historical towel (save for Warlord/Bolt Action related WWII) and got rid of all their Company B stuff. As I said in a previous post, snavelled the lot - some seven AVs for the price of three (and a bit). Included were a number of Italian AVs and kanone (the reason I went there in the first place) including [drum roll] the Semovente 90/53 AA gun (the Italian version of the German's famous 88). This is the version the Italians cleverly mounted on a M13/40 tank chassis, after experimenting with it on the flatbed of a Lancia truck. The latter proved a bit of a cumbersome arrangement & difficult to serve as it stood shoulder height off the ground and all the ammo have to be passed by hand up to the guys on the rather exposed gun platform.  The whole contraption stood nearly 3 meters tall - so quite a profile to aim at!


Most (but not all) of these problems were solved by the Semovente version.  It dropped the profile by nearly a meter (important out in the open desert) and of course was completely mobile, accompanied by a little Semovente crew tank towing the ammo cart. It could stop when-wherever, the crew dismount and fire the gun with very little prep - no parking the truck and deploying monster stabilizer arms etc.  The major drawback was the crew served the gun in the open, thus vulnerable to small arms, shrapnel etc.


Why they didn't move the gun forward on the chassis and make a protected bit on the tank like the German Marder for example, we'll never know. Maybe they thought with and effective range of up to nearly 3 kilometers, perhaps they thought the crew didn't need protecting as they'd be able to shoot anything long before it got into range to shoot at them.  Dunno.  The thing I forgot was to add my Italian gun crew to my last Perry's order. ^%&*#!!! Still, the three-piece Company B Semo 90/53 cost me about 25% of the Perry's version (which is just the gun I might add!) and has come up a treat. The decals on it are also for an unarmed command vehicle so when not lugging ammo about for the 90, it'll double as my Italian AV command tank.


The decals I also ordered from Company B (with bits and bobs like 50 Cals for the Honeys) arrived so I was able to finish that and the rest of my Ital AVs. I have had mixed success with the US postal service - it can be expensive and slow - but I have to say unlike my local hobby shop where I got the models, Company B responded quickly and were quite reasonably priced with P&P - everything arrived from the US (to Australia) in under three weeks by normal surface mail. I've had similar experience with the Shapeways 3D print mob in New York and with ordering figures from Brigade Games (located in New Jersey) - all took 2-3 weeks and postage quite reasonable (considering its traversing halfway around the globe!)


The other Italian AVs were the L35 Flame tankette and an Autoblinda Armoured Recce scout vehicle. The former is a great little model with open-able hatches which enabled me to put in a Perry's Italian crewman I'd been saving up. Perfecto fit!  Armed also with a Breda MG, its a nasty bit of work for any PBI to encounter.  The only thing that'd worry me is the L35's vulnerability to small arms (well small-ish) like HMGs and Boyes AT rifles (one of the few AV's a Boyes could knock out!)  That little tank full of jellied fuel it has attached to its arse would make a very large fireball too I'd imagine. Momma Mia!  Still, it could shoot a jet of flame 50-60 meters AND machine gun you (not at the same time of course) so a nasty little anti-infantry weapon that fits it well with my L35 tankette squadrone.  Avanti!


The other one is the Autoblinda scout AC with its 20mm autocanon. Nice.  This is the one that did so much damage in our Op LIGHTFOOT game at Jolt a few months back.  Pity the gun isn't a bit heavier but still a nippy beast (both forwards AND backwards!) with quite a sting as it also has forward and rear facing Breda MGs.  Again a nice little model from Company B and I know why I got THIS one cheap - it only had three matching wheels [grrr] which meant that I had to scrounge around. Fortunately I had the ones from the Bofors which fitted perfectly - not the solid wheel-hub variety unfortunately but that will only offend the pedants I'm sure! She goesa bangabangbanga!


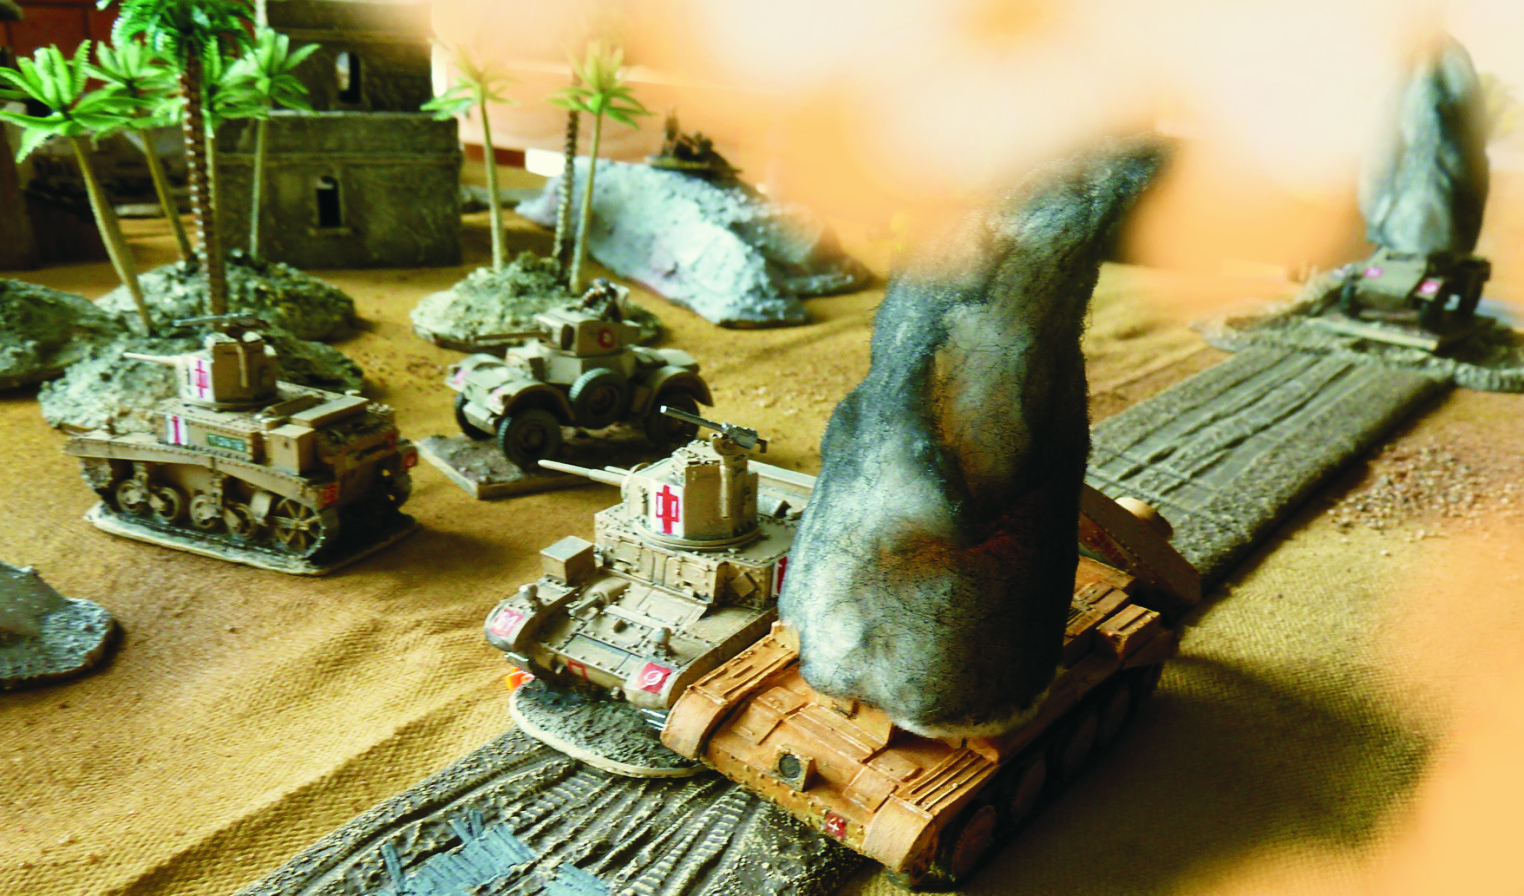
Another of the Company B AV models was an M3 Stuart 'Honey' which I'd hoped matched the two I got previously from Shapeways. I could see there were differences but it was impossible to tell until I'd put it together. Unfortunately although the Company B version was the earlier make of the Stuart (the A1), it was also significantly smaller than the Shapeways 3D versions of the Stuart. A nice model nonetheless.


And now the two together...


The Shapeways version is considerably larger.  Bugger.

But the Shapeways ones go well together!


The solution was to make the Company B version into a Brit Stuart with its unique zigzag sand and khaki camo pattern (which also came in a blue and sand version) and the other two as Aussie 6th Div. Honeys. The advantage here was the command figure I got with the Warlord Dingo scout fitted nicely into the open hatch version.  I also added the 50 Cal MGs I got with the decals from Company B to all the Stuarts along with wire aerials.


The other problem with the Shapeways versions was the fact that, being 3D printed, they weighed almost nothing. I could see them getting damaged with handling on the game table in no time flat so to give them more heft I filled them with plaster of Paris - both hull and turret - and it worked a treat! They are a bit rough on the finish and well... damned expensive! So I won't be getting any more BUT as I said before, the P&P was reasonable and timely, so if they produce something that appeals... ya never know!

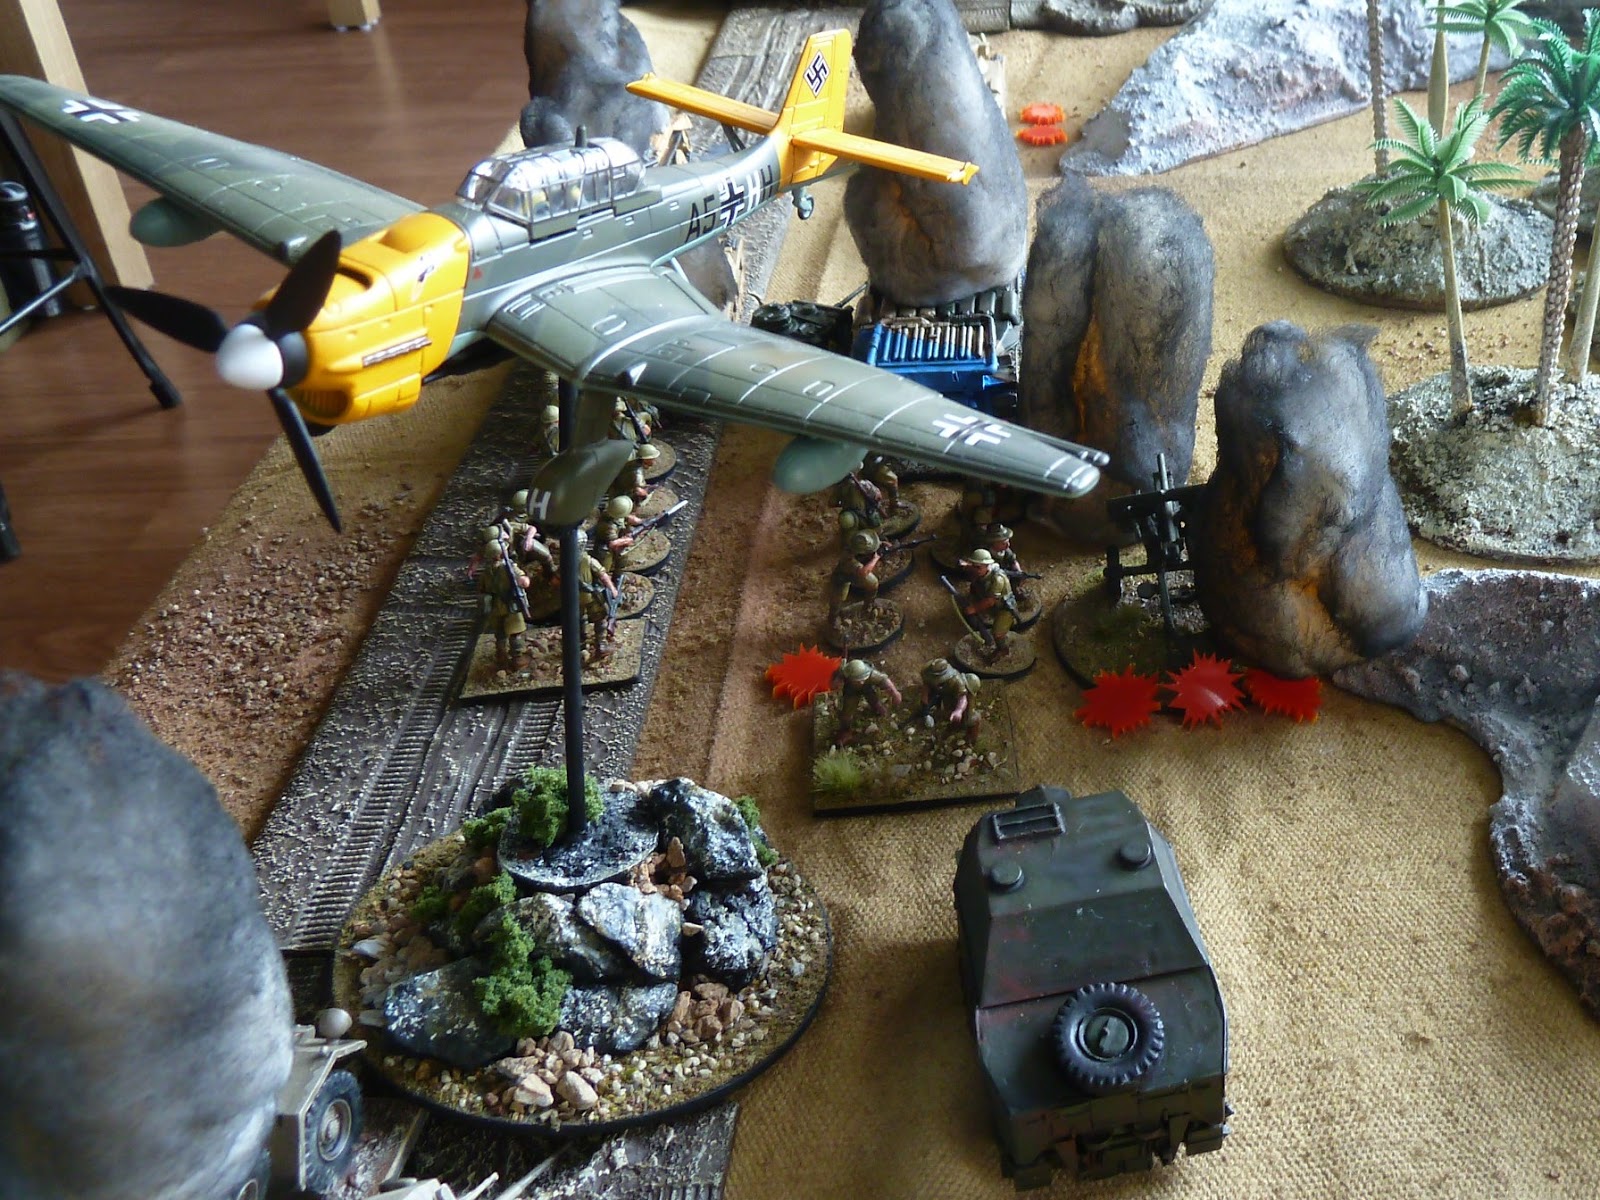
The last item on the agenda was adding a crew to the Bofors.  Similarly to the Shapeways models, the Romanian (!!!) Bofors model (a nightmare to make) is a trifle oversized but figures from the gun crew I got from Perry's actually fit in well.


Well the Luftwaffe better watch out - these guys look the business!  Had to find a solution to the blasted German 'flying artillery' Stuka that seems to do so much damage.  The Allies needed that Bofors!


That's about it for now.  Hordes of things Napoleonic on the workbench which I must get cracking on before Santa comes and the real madness begins!

Well Santa has come and gone leaving some much needed goodies including a complete British 25pdr, quad, limber and crew as well as a crew for my Semovente 90/53 which I have just finished. Based up, the Perry figures fit in perfectly with the US Company B Semo - note the crewman feeding one of those monster shells into the gun breech. As I have a number of Austrian Napoleonics done as well I thought I'd add the photos of the Italian crew to this post as an update.


Wishing a Merry Christmas and a happy New Year to all the followers of Doc's 'Art of War'.

Tuesday, October 6, 2015

Bolt Action Op LIGHTFOOT game

Taking a break from painting up my Bavarians (and domestic duties various!) just had a great Bolt Action game at Jolt Games in Mitchell so I thought I'd post the AAR and photos of the day.  The scenario for the game was loosely based on Operation LIGHTFOOT, an Allied armoured assault on an entrenched Italian held position in North Africa, devised by Andrew our Bolt Action guru. My mate Paul and Andrew played the Allies and myself the Italians (a nervous first for me).  Given the Italian propensity for morale collapses and running away - two more unit losses than the Allies and you have to test to see who stays and who doesn't - I was rather worried about just how resilient my Eyeties would be under a sustained armoured assault. As you can see from the following photo of the Allied armoured juggernaut waiting to be deployed - I had good cause to worry!


Another attraction of this scenario was the availability of air cover for both sides. I bought 'Doc's Airforce' along with a Blenheim bomber, Hurricane fighter and Gloster as a scout plane for the Allies and a Stuka and a Macchi 'Arrow' fighter for the Italians - each side diced for which plane and when they came on.  Luckily for me I got the Stuka which took at least three turns after I got it before actually coming on to attack, doubly lucky as the Allies did not have their usual Ack Ack - Andrew left the Bofors at home - while the Italians had a 90mm monster mounted on a truck which doubled as either a heavy AA or super-heavy AT gun. Unfortunately for Paul and Andrew they were only able to get a scout plane on at the end of the game (survey the damage I suppose) so I never got a chance to check out the 90's AA capabilities! Not that it mattered, as an AT it is superb - easily as good as an 88 - and had a major affect on the outcome of the game.

The 90mm author of much mayhem...  'effin' big gun on a truck! I had no idea the Italians had something like this.
Hot work on the 90 - carting those monster shells up there would have been quite a job in the desert heat!
The generous tables in Jolt meant that it was also a chance to test out my new desert battle matt - all 12' of it - and given the size of the respective forces, we needed every inch of it! Biggest WWII game - at least as far as armour is concerned - that I've ever been in! The combination of Andrews and my Italian armour gave me a decent force of about five M13/40s, three Semovente AGs (two of them with 75s) and a half dozen L3/35s, one with a 37mm AT gun as well as various scouts - a Lince (as armoured command vehicle) an Autoblinda with a 37mm autocannon (sweet!) and my awesome Sahariana. Together with two full platoons of infantry (3 x sections each) together with two 75mm field guns, 81mm mortars, HMGs and Elefantino AT guns it was quite a large defensive force.

Infanrty section with sniper team in the palm grove, next to it a well fortified position next to the other road into town protecting a 75mm field gun, a HMG and an 81mm mortar with a Semovente AG (47mm gun) parked behind the barbed wire barricade next to it
Italian infantry defending a native grove of some sort but behind them a major trench complex bristling with MGs, ATs and mortars AND the command. Strangely I don't think one shot was fired at it the entire game. 
Needless to say my careful preparations still did not prevent first blood to the Allies and my Sahariana brewed up after her crew abandoned her on fire. A British scout (Daimler?) fitted with a Boyes AT gun (i.e. giant rifle) scored a shot on the rapidly reversing Sahariana setting her fuel cans on fire.  I failed the saving roll so the crew, rather than put the damn fire out, abandoned the vehicle.  Oh the shame, the shame!  Personally, I blame that useless sot of an NCO swigging on his vino in the back of the car. Andrew reckons its the first time he's ever seen a Boyes AT rifle set fire to anything in a BA game, let alone knock something out.

Momma mia shes-a burnin'!

Shameful - the abandoned Sahariana goes up in smoke
The loss of the Sahariana right at the start meant I had nothing to radio in what was coming through the town approaches but for some reason my opponents seemed intent on driving down the gun-barrel straight main road on the right flank.  That would be the one I parked my truck with the 90mm at the other end. The response was swift and just as deadly.

Op LIGHTFOOT opening shots - and the 90's first victim  (this is one end of the table - the 90 is at the other end!)
Under fire the Autoblinda beats a hasty (albeit temporary) retreat - finding that reversing gear rapido as the Allied lights - a gunned up Humber scout and two Honey's race onto the table
The Allies very nearly drove in my scouts which would have blinded my guns as they were acting as the Forward Observers. Nearly.  Actually the 'Blinda performed magnificently and even if it took half the game to discover it was armed with an auto cannon (two shots instead of one) it gave good account of itself, getting pins on the Honeys and more importantly NOT running away but providing a blocking force of its own that meant the only way out of the town was down the road - where all my ATs were ranged in!  It was down this road that Paul's Vickers light tanks raced - to their doom (brave lads tho)!

The 'light' Semovente AG claims the first Vickers
As expected the Allied armour poured on in successive waves - so much of it I believed it was only a matter of time before they started to overrun my outer defenses. But that never eventuated as the brave 'Blinda held up the Allied lights in the centre and the awesome 90mm Super Heavy AT gun got into action. The Allies had four Matildas, two Valentines and a Bishop (25pdr on a Valentine chassis - a sort of British KV - and almost impossible to stop with most of the lighter Italian ATs) as well as a Crusader, two Honeys and two Vickers Light tanks and four armoured scouts: Humbers and an ancient Rolls Royce - the later with armour so light it was classified as a truck - mounting a Vickers HMG turret though. Add another two 25pdrs and numerous 2pdr ATs including a portee and there was plenty of fire-power to be unleashed on the Italian defenders. It should have been but much of it never got the chance as an enormous firefight developed in the the centre and the 90mm began to pick off tank after tank as they tried to come down the main road.

Another one bites the dust... the Crusader falls victim to the mighty 90
A tough-as-nails Matilda succumbs to the 90 - the marker in the middle is for my eventual air strike that I called in because even the 90 couldn't contain all that armour

The third thing that sealed the game for the Axis was the air strike. I got lucky with the dice and got the Stuka rather than the little Macchi fighter but it still circled for three turns before finally striking (trying to communicate with the Italians on the ground - he probably just ordered a pizza with the lot). One more turn and the target would have been too dispersed but it had a second Matilda with accompanying infantry section behind and a newly deployed 25pdr to one side. The tank with its thinner top armour stood little chance with a direct hit.  The infantry behind rather than dive for cover stood up and blazed away - very tough boys (Aussies of course) and although loosing two of their number, continued to advance sans tank cover! The 25pdr took the other direct hit and amazingly (bit controversially I think) was not damaged or destroyed BUT the crew were either killed or ran off (whats that? RHA abandoning its gun? Never!!! I hear you say) so quite a result for the Stuka. No wonder the Allied infantry hated them - its been my experience that whenever they've been used in a BA game they have caused major destruction - save once which we blamed on the Italian pilot and on one other occasion when Andrew remembered to bring his Bofors!


The surviving Matilda continues to grind forward... very very sloooowwwly.
The Allies got absolutely hammered on that open road BUT despite their armour losses, pressed home the attack without the tanks.  Aussie infantry y'see - tough-as-nails!

The centre of the battle was no better - absolute carnage ensued.


The battered 'Blinda had played cat and mouse with the Humber scout and two Honeys for the entire game - getting shots in with its 37mm - which slowed Honeys down as they in turn tried very hard to kill it off. One finally got around behind an put a shell into the engine compartment that started a fire but either passed right through or failed to explode. The Autoblinda's engine was kaput so she ended up unable to move from her perfect blocking position even if she'd wanted to AND (more amazingly) the crew didn't bail but chose to fight on. That's gotta be a first for a buggered up Italian AV! After taking care of the two Vickers I sent the Semovente to its aid where it dueled with the second Honey but was caught as the Humber sneakily drove  OVER the hill and bushwacked it from above.  The 'Blinda gave the Humber two in the guts from point blank and brewed it up in turn.  The 'Blinda also disabled the Boyes mounted scout that killed my Sahariana as it tried to find a way out of town other than the rather dangerous road. Set on fire the crew abandoned it rather than putting the fire out - just like the Sahariana!
Autoblinda about to get one up the derriere from a soon-to-be-cactus-itself Honey. Note the Rolls Royce tin-can in the background - its story was as nearly remarkable as the 'Blindas.

The Autoblinda after copping a stingy one in the rear continues to blaze away at anything and everything - on this occasion the Bishop mobile 25pdr (just out of the photo) - but despite scoring repeated hits Andrew very un-generously ruled no damage, not even a thrown track. That's what happens when your armed with a pop-gun, full marks for effort though. Note the AT armed L3/35 behind causing mayhem amongst the cluster of Bren carriers. They had disgorged their Vickers HMGs to deploy in the open where they were all eventually destroyed by intense Italian fire.
Paul's Rolls Royce AC is a virtual tin-can so light armoured its rated as a truck (thus vulnerable to small arms fire).  Despite being vulnerable to just about everything it charged madly forward against the Italians in the palm grove, blazing away with its Vickers HMG. Never has one tin-can fired so many rounds with so little result BUT I'll be generous and say one or two KIA and the entire squad pinned, hugging the dirt for the rest of the game, only a casualty or two away from bolting in my opinion. 


The Rolls managed to achieve this despite having every available weapon that could get a bead on it firing at it. It must have resembled a colander but kept on blazing away at its tormentors. At one point no less than four mortars FAILED to range in on it (see coloured dice next to it in photo below).  That's one serious bug I have about about Bolt Action - its way too hard to range in with mortars as it requires a D6 to do so. History tells us they were far more accurate than that in experienced hands - more casualties caused by mortars than any other weapon apparently so they were  effective. The Italian 81mm was considered one of the best in WWII and the Italians knew how to use them - quite deadly in experienced hands SO I say with an experienced team D5-6 to get on target, only a D6 for an inexperienced mortar team. For a veteran team make it 4-5-6.  Gotta make mortars more useful in Bolt Action I say. 


But I digress - the Portee (truck-mounted AT gun) deployed and took out my M13/40 sent to bolster the flank.  Showed the risk of my strategy of relying on defence's firepower and feeding my armour reserves in piecemeal.  Here the effectiveness of the Elefantino 37mm ATs also comes into play - they took out the Portee at long range. Against lighter vehicles and tanks they are as effective as any other AT gun. 


At this point we were running out of time as after eight? or more turns the Allies had failed to crack the Italian defences and had lost over a half of their armour destroyed or abandoned for Italian losses of one Semovente, one M13/40 and the Sahariana scout (burned out) and the Autoblinda immobilized (but still shootin'!).  One L3/35 had pinned the furthest most infantry and wiped out half a section with repeated twin Breda MG fire. Losses amongst Italian infantry were negligible - two or three - although both forward sections were pinned. The 75mm gun in the middle took two hits from one of the 25pdrs, gaining a host of pin markers and loosing two crew but the surviving gunners remained at their post. Brave lads - a bottle of grappa from the commanding tentente is on its way to their position I'm sure! 


The Allies could not get their air cover going at all and in the end a scout overflew the battlefield to radio back the Allied failure to crack the Italian defences and Op LIGHTFOOT was called off. The Allies withdrew also leaving two damaged tanks and an armoured car abandoned for the victorious Italians to recover.  Quite a convincing victory to the Axis on this occasion. Dug-in Italians with plenty of AT and armour (even tankettes like L3s) are a tough nut to crack, despite their sometimes fragile morale.  

The advantages to me in this game were the extra commander which gave me initiative on all but two or three turns AND the super-heavy 90mm AT gun which in hindsight really should have been targeted by whatever means necessary by the Allies from the outset.  Without the damage it inflicted on the that flank I doubt I would have been able to have kept the Allied armour from overrunning at least my outer line of defense. Had THAT happened then the dodgy Italian morale thing would have almost certainly come into it (and who wouldn't run from a Matilda - especially as they're so slow you probably could outrun one if you tried!) 


Big thanks to Andrew for organising and both he and Paul for being the most congenial of opponents. A really great day's wargaming was had by one and all at Jolt Games in Mitchell. Do yerself a favour and get down there for a game (and tell 'em Doc sent you!)