Showing posts with label Austrian artillery. Show all posts

Monday, July 22, 2013

Austrian Cavalry Artillery Battery

As I've explained in previous posts on the Perry's Napoleonic Austrian artillery I'm doing up, the Austrians didn't have horse artillery in the true sense.  They had a kind of mobile light artillery, unique amongst the armies of the Napoleonic era.  They used it predominantly in support their cavalry formations, hence the reason it became known as cavalry artillery.


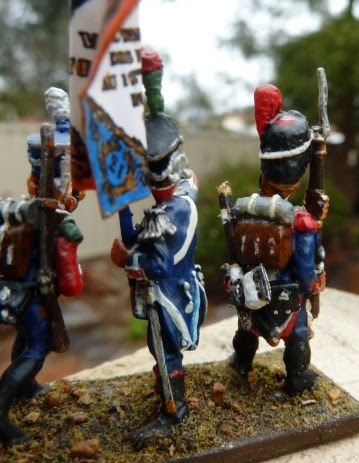
The Austrian artillery sets produced by Perry's are amongst their finest and some of the best I have ever seen.  When they came out with them I just had to have a complete set for an Austrian cavalry artillery battery!


Its been a long haul with lots of other figures demanding paint and the odd spot of wargaming too, but I've finally finished my complete cavalry artillery battery set.  Really pleased with how they turned out, even though they occupy a rather large piece of wargaming real estate when you set them up on the table.


The artillery crews come in two basic poses: firing or loading.  The latter kind of adds to the overall base as the guns themselves are long and the rather slender rammer is longer than the gun barrel again.  I'll have to watch them carefully when gaming as the rammers are a bit bendy.


Achtung! Feuer Kanone!


The figures do have fairly fine tendrils of metal flash that have to be carefully trimmed off, some are so fine that they are difficult to spot amongst the other fine detail on the figures.  These figures are 'true' 28mm and the bases are thinner than other makes, which means the figures don't tower over their guns (a real problem I had once with Old Glory's Russian Horse Artillery).  The guns are, as you'd expect, fiddly to make with those funny looking seats on them (their appearance earning them the name 'sausage guns') that come in three sections and a slender handle that attaches to the rear of the gun trail.  All glued together with much Superglue and more patience!

Another shot of the crew loading - note the figure immediately behind.  He's about to place his leather encased thumb over the touch-hole so there's no nasty premature detonation during loading!  
The guy rummaging about in the ammo caisson fits in quite nicely although he is a little too close to the guns - the crew behind are eyeing him nervously!

I've still got a few limbers to do up for my other Austrian batteries but they can wait as I'm doing some Warasdiner Grenz at the moment.  Just been doing a bit of research to make sure I get the colours right, especially on the facings. Grenz Regiment #6 were 'crab red' - an Austrian colour that was closer to a very dark orange than red.  And the cloaks on the back were a really dark red, almost crimson rather than the fire-engine red they are usually depicted as.  This sage advice comes from no less an authority than Osprey author Dave Hollins himself, so I'm going to stick with it. The only concession I'll make is on the webbing which Dave says was mostly standard white as for the rest of the Austrian infantry in 1809.  The black webbing, same as the Jaegers, was only introduced sporadically before then and not for all the Grenzer regiments until after the 1809 campaign.  But I'm going for the esthetics of the black, just for appearances sake.  Like a true heretic.  I'll post 'em up when I've finished them as I also have a regiment of hussars to do as well.  I tell ya folks, for this curmudgeonly old pensioner, the fun just never ends!

Monday, July 8, 2013

Conversion - Legere Pioneer & the Austrian Artillery Caisson AND Big Lee's Big Achievement!

Converting the Carabinier figure on the end of the command stand of my redoubtable 13th Legere was something I've been meaning to do for some time but kept putting it off because of the miniscule amount of 'green stuff' putty required. Creating the ammunitions in the Austrian caisson I was building gave me enough reason and putty to try my hand at a simple conversion.  It was also the first time in a long while I'd actually used this two-part modelling putty so it was all a bit experimental. After working it up for a while and getting it warm enough to mold - it was one the coldest days of our winter so far - it actually turned out OK.  The good thing is that it takes a while to dry and set which gives you plenty of time to shape it the way you want. For our Carabinier all that was required was a pioneer's apron, a decent beard and an axe. It was the latter that caused the most problems as I couldn't find one to suite, so had to scratch-build it out of bits and pieces.

Our Legere command stand - the figures are Old Glory & Hinchcliffe (the hornist). 
Should have done a 'before & after' as I've already applied the green stuff to the carabinier
Detail showing the scratch-built axe
Shaping the metal axe head was a pain but I managed it out of a bit of metal flash from the Perry's caisson wheels.  You have to be careful removing it as it connects the two wheels rather solidly and you will rip the wheel rim off part of it unless you cut it precisely - as I discovered when making the limber up previously!


Dunno if I got the sling arrangement for the axe correct - I think the entire axe head was encased in a canvas sleeve - but I have seen them slung like this too.  Anyway Smiling Jim here now looks more suitably ferocious with his bushy beard as befits a pioneer type and most importantly, he's got an axe!

Once I got this one out of the way I got stuck into my caisson model.  What a challenge!  It was missing its fifth wheel (that I belatedly discovered is attached on the rack at the rear) and a funny little cage basket arrangement at the other end which has horse blankets stuffed in it or something.  Anyway I reattached the rack and bent it into the shape required and found a suitably sized wheel to go on it.  The spare wheel has a boss and plate arrangement to hold it to the caisson rack which I ended up making out of plastic bits and pieces.  The other end of the rack was bent into shape to fit the front as the carriage basket.  In addition, given that the figure supplied with it is opening the cover to it I thought the caisson should have some ammunition in it, hence the 'green stuff' modelling putty.


I should emphasize that I was guessing what the inside of a full caisson would look like, based on what I know of what the Austrian artillery used. One picture I saw showed a partitioned caisson with three or four sections containing powder and shot in stitched into bags.  I opted for something a little more ad hoc with stacked ammo under a canvas cover, with some loose shot and some powder bags at the other end.  The artilleryman figure supplied with it is an interesting pose - it could be an Austrian surrendering too! (Hmmm, one of the Austrian casualty poses was a figure running away, now one in a 'hands up' pose - am I sensing a theme here?)

Hey I'm just lifting the lid on the caisson - not surrendering OK?!
While artillery ammunition was 'bagged up' the powder in an exact amount in a linen bag, placed into a larger one with the ball on top and then stitched up, it was equally likely to be stored separately when on the march. When rammed down the gun barrel, the powder bag would be directly under the touch hole. The detonator was a quill full of fine powder used to prick a hole into the bag which was then ignited via the touch hole. A hazardous business made less so if you had everything sealed up rather than a lot of loose powder but you can imagine going through this prepared shot very quickly in action.


To give you an idea, the average caisson carried 300 prepared shot, ideally a caisson for each gun in a battery.  The gun limber had a small shot locker which carried up to 30 prepared bags of powder and ball (for a 6 pdr - obviously less for a larger calibre gun) but operating at peak efficiency - and Austrian artillery was nothing if not efficient! - this would be expended in between 15 - 30 minutes of continuous firing. One caisson would give a battery of  four to six guns about an hours worth of continuous firing.  At Aspern-Essling nearly 200 Austrian guns were estimated to have fired off more than 20,000 rounds, firing over nearly 10 hours. For Wagram it was nearly double that amount - so that's a lot of artillery caissons! Massed artillery in any battle was an enormous enterprise, with hundreds of wagons drawn by thousands of horses just to keep the guns firing. 


Well, that's the caisson done.  The base is about 5mm shorter than the artillery limber base (minus the lead horse team section) so hopefully not taking up too much room on the table.  Now on to the Wurst gun battery. And a Grenzer battalion, and another one of Hungarian line and ...  about time to put the brushes down for a bit and do some wargaming I think!

Cheers,
           Doc

As a postscript to this post and a shameless plug for the chance of a prize I present the title banner from Big Lee's latest post on the BLMA blog: http://www.blmablog.com/2013/07/blmas-millionth-pageview-givaway.html

Seriously folks, its quite an achievement for our hobby - I've not heard of anyone reaching that milestone so well done to the big fella and in blogging terms lang may yer lum reek!


Tuesday, June 25, 2013

Austrian 'Wurst' Gun, Crew and Limber

Just completed one of the most challenging models I've put together in some time - one of the Perry's latest releases from their metal range of the Napoleonic Austrian army: the 'WurstKanone' with crew, limber and team.  Its a huge metal model - together with some of the Russian gun limbers, one of the largest Perry's make.  The metal kit consists of six horses, three of which have the 'Fuhrwesen' teamsters molded with the horse, the seven part limber (seven parts!), the 6 pdr gun and four man crew.  


Its a beautiful model and up to the Perry's usual high standard.  The poses of the teamsters and gun crew are fantastic with one leaning on his pommel while his horse crops the grass, another twisting in the saddle - so I've got him talking to the gun crew Kaporal who's probably telling him not to take off before the crew are properly perched on their precarious looking 'sausage seat' on the gun trail (and from whence the gun got its name).  I note there are no handrails or anything to hold onto, just a foot-rail on either side of the seat, so you'd think going at anything faster than a brisk trot could be a tad risky!


Although beautifully made, putting the limber together with its very fine metal parts and the two-piece limber shaft was a real pig! There are plenty of limber pieces - more than you'll need, so that putting the team together even with (if you were a real pedant) fine jeweler's chain is distinctly possible.


There is some flash on it here and there, requiring a bit of clean up with scalpel and fine file before gluing etc. Because of its size (its over 26 cm long) I decided to approach it a bit at a time, including dividing the base into three.  Once I'd finished putting the limber and gun together (the limber over and over again!), I base coated and painted all the figures horses and pieces separately.  Once these were just about finished - I did the mounted teamsters first on the middle base section, removing them from the paint sticks. [A word of warning here: I use a hot glue gun to put 'em on wooden ice cream sticks - don't overdo it with the hot glue!  The horse and figure bases are quite thin and will bend and break when removing them from the paint sticks unless very careful!]  After a few anxious moments I mounted the three teamsters & horses on the main base and let dry while I finished the gun, crew and limber.


I decided to mount up the gun on a separate base so that the limber can be used with or without and with a full six horse team or four (thinking about the size and the room it takes up on the wargaming table here).

The crew mounting up on the 'sausage seat'
The corporal has a word...
A precarious looking enterprise
The idea of just having a limber is so it can deploy behind the battery (once I've finished it!) or be limbered up - (about to be) on the move as it were.  The other piece I've got to go with this is the Austrian horse artillery caisson - it also looks like its going to be challenge!  Artillery batteries with attendant limbers, caissons, extra gun-handlers as well as the guns and crews themselves were an enormous enterprise and quite difficult to represent on the wargaming table.  The sheer room the establishment of a three or four gun battery requires would be just too prohibitive - mind you, if you were of a mind to, Perry's produce all the bits and bobs you'll need for any of the main armies. I did see one done once of a French battery with 'hired help' resting limbers, caissons - the lot.  The full thing looked magnificent but would have taken up a sizeable chunk of an average table!  What I want to do is have that higher level of detail but take up the minimum space.  At least that's the plan!

Four horse team and limber section

Detachable lead team
The gun and crew also presented a bit of a challenge to base separately as the gun trail had to be able to be mounted on the limber as well.  I'll just have to remember to lift it separately when I put it on the table for a game!


Gun base section
The thing to remember is that Austria was the only major army NOT to have true horse artillery!  The 'Wurst Kanone' were the closest thing that they did field - more of a mobile artillery than a true horse artillery.  I don't believe they moved anywhere near the speed of the cavalry they were meant to support - certainly not comparable with the French, Russian, British or even Prussian versions.  Limbered up with crew straddling the long gun seat they reportedly moved at a brisk trot at best.  These were not sprung so you can imagine it would have been a fairly bone-jarring trip across the battlefield before leaping off to unlimber and deploy.  The seat could be removed but it was often left on during action so they could rapidly limber up and move at a moment's notice - even if they didn't travel that fast!  Nonetheless they were a mobile artillery and considered themselves elite artillerymen - the Austrian artillery was never less than proficient and at least as professional as their French opponents, even if tactically they didn't match the French use of artillery.


So, a 'Wurst' battery is a must-have for any respectable Austrian army - one limber down, one caisson and battery to go!

Saturday, October 31, 2009


Advance Guard command


Advance Guard - Uhlanen


Advance Guard Infantry Bde
- Warasdiner Grenzer


Austrian 'German' Infantry Division


Chevaux Leger Regt 'O'Riley', part of Cavalry Bde


Cavalry Bde - Elite Front Rank and Dixon? figures. Still need to acquire another battalion of grenadiers and some real 'wurst gun' mobile artillery. Just got a Front Rank version of Archduke Charles on rearing horse same as Bagration etc etc. Nice figure in the chunky FR way and should paint up into a good little command vignette.
Here are the armies, starting with the first I collected and painted, the Napoleonic Wars Austrians of about 1809. This is an 'Advance Guard' Division with a light cavalry brigade of hussars and Uhlans as well as and infantry brigade of Grenzer (Warasdiner regt.) and Hungarians - note the 3 pdr with the Grenz - with Div commander, ADC and escort.


Next is a Line Brigade consisting of elite German Regt. IR 4 Hoch & Deutschmeister, with attached Jaeger battalion. To their left is my Reserve Div (in the making) with two battalions of grenadiers to make up one the composite grenadier brigades and the start (just two 'flugel') of my now complete 16 figure cuirassier unit. Reserve Positional battery of 12 pdrs is in the foreground. Most of the figures are 'Elites', with some Foundry (the cuirassier) and some Connoisseur(?) thrown in for good measure. Wasn't too picky when I started - as long as they all fitted in together.