Friday, October 23, 2015

Chain of Command game: SOWCHOS (Collective Farm) 79

We made the trek down to Goulburn last weekend to have a Chain of Command game with the lads at the Goulburn Soldiers.  Huuuge club, decent lunch too.  The boys set up a really cool looking table with terrain representing a Soviet Collective farm (No. 79) on the steppe about 25 miles or so south of Stalingrad on 8th December 1942.  The scenario was the action to stabilize the left flank of the German relief effort with General Balck's 11th Panzer Div (the famous 'Ghost' Division) detouring to attack Sowchos 79 held by elements of the Soviet 1st Tank Corps. Andrew and Jason played Russians, Luke and myself the Germans.  It was my first CoC game since last year but it soon came back to me and I remembered just how good (as in realistic) and fast moving they are.  Far superior to Bolt Action in my opinion, and quite a different beast to play.

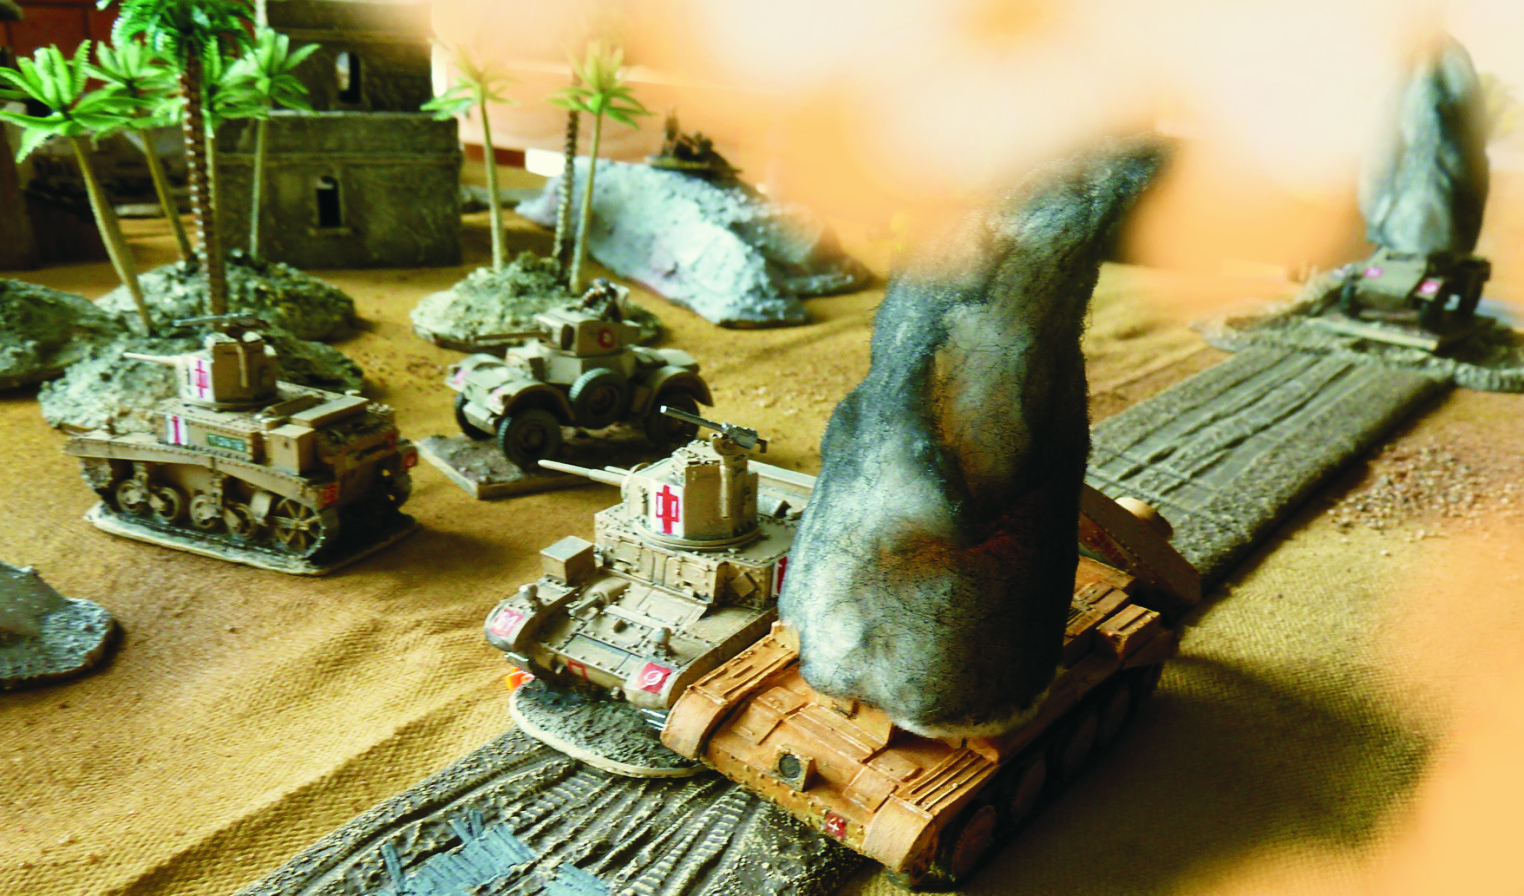
Sowchos 79 with the Russians occupying the village on one side of the crossroad.  Nice and wintery although a sudden local warm-snap had inexplicably melted the snow off several trees.
You have to start making decisions before the first dice are rolled i.e. what combination of units do you want off the lists provided (the Russian list was intimidating too - knowing what you could be facing). Then roll three dice and see if you can afford 'em!  The choice of armour was reasonably straight-forward, wanting to get on and into the town as fast as possible but not risk getting demolished by the first Soviet shell!  Tanks then.  A Panzer III and a STuG accompanied by two & a half infantry squads and a light mortar for support. With my patrol phase completed and my jump-off markers close enough to gain the hard cover of the walls lining the road, I nervously rolled my Panzer III on to see what I could see.

My Panzer III belting down the road towards town when he notices something very large and mechanical coming round the bend at the other end of town...  oh crap - its a KV!
The Russians got off to a good start with Andrew's men occupying the town and bringing their slow armour on.  Now you don't usually associate 'slow' and 'armour' with Soviet tanks unless they are steel monster KVs with 10"armour.  The Russians had two of 'em and only my last-minute decision to have  'Pre-game barrage' from the list (instead of the delightfully-named 'Panzerknacker' Team) saved me from facing both KVs and the hordes of Soviet infantry.  In fact the barrage successfully prevented Andrew and Jason from bringing on overwhelming forces early on which probably saved the German's bacon.

I rushed one section up to the other side of the road and let the Russians have it!  Note jump-off marker - it was as close as I could get to the village before Andrew locked it off with one of his in the nearest house (just behind the tree). 
Two choices facing a KV - run away immediately or just shoot and keep shooting!  My plucky Panzer scored some lucky initial hits, getting three shells into him taking out the hull MG (puff of white smoke above) and giving the KV two pins.
The Russian response was predictably brutal with the KV putting several holes in the Panzer and killing the gunner.  Also got two pin markers but remarkably nothing blew up in the tank - just a bit more ventilation - just what you need in winter!
Faced with a KV at the other end of the road I felt I had no choice but to duke it out as any attempt to veer off the road to take cover would have exposed my weaker side armour - in other words there was initially no way to avoid being shot at so my Panzer went for it. Closing the distance and blazing away with his 51mm high velocity gun (not even a 75 [whimper] - and facing 10" of Soviet steel!!) he amazingly got three AP shells into it. But Andrew's KV was having none of it from that Fascist wurst-wagon opposite and got three back one of which spread the gunner around the turret, taking out my main armament.

One frustrated KV commander - managed to shake the hit markers off but now the target has disappeared! The figure with all the pin markers to the immediate left is the lone survivor of the 1st Russian section legging it past the Maxim concealed in the objective house (and Russian jump-off point with the Soviet marker on it)
Two things saved me in the end.  When Andrew needed to roll high on the hit chart he failed time and again and having my gun knocked out of action meant I had to order my radio operator to clean the mess out of the gunner's seat and take over shooting duties. To do this I needed to buy some time (two turns to be precise) - and here's where C of C's SENSIBLE rule regarding mortars comes in.  I had the choice of one support weapon off the list for my initial force. I deliberately chose the 5cm mortar team and had my senior NCO order them to drop smoke in front of the Panzer while emergency 'repairs' were made to get the gun operational again. At short range requiring a 5 or 6 I managed to get the smoke right where it was needed, masking the Panzer from the KV while the frantic crew struggled to get the gun working.

With the Panzer temporarily out of it, the firefight between the infantry on either side of the crossroad got very intense.  My squad closest the tank to the left got hammered from the Russian squad diagonally opposite and the Maxim MG in the house.  On the other side after some poor initial shooting my section started to whittle down the opposition with the help of the Panzer's hull MG. My sure-shot mortar boys dropped more on the other Soviet section near the bridge, helping reduce the odds on that side.
Surprise! I'm baaa-ack! The Panzer III charges through the smoke with its 50 blazing at the startled KV. Note the startled expression on face of the Russian tank commander. Note too the German section has managed to shoot the Russian one opposite off the wall and now have just the Maxim in the house to contend with (and that's bad enough).
Once the new gunner was in place I ordered the Panzer forward to attack the KV. Actually I don't think I had a choice as there was literally no place to go but straight up the guts with guns and smoke! Anyway my gamble payed off as in two rounds of shooting I managed to pump another four shells into the KV, putting one into the engine immobilizing it and killing or wounding the gunner and/or tank commander. Remarkable to survive that many hits without brewing up but KVs are extremely tough and difficult to kill.  In the end the surviving crew abandoned the tank when Soviet morale finally broke.

The worst German losses were suffered by the section containing the second and third squads.  Fire from the Soviets over the road supported by the Maxim MG on the other side of the crossroads (before the smoke ruined their aim!) saw three schutzen  and an NCO killed but their morale held until rescued by one of Luke's squads sent as a reinforcement.
One of Luke's squads arrives in the nick of time.  They helped my guys to cut down the remaining Soviets before the next Russian rifle squad arrived. Their firepower added to mine and supported by the mortar cut down half of the fresh Soviet squad. Once this happened the Russians on Andrew's side of the table failed their morale and broke, leading to a general Russian retreat.
The other side of the table showing Luke's men about to make the much more hazardous advance in the open.  I can't remember if the STuG is his or mine but I don't think it got more than one or two shots off before the game ended.
Luke's men rush across the flat open steppe towards yonder Russian-infested forest. Game or what?
Waiting in the woods were Jason's  Soviets on Overwatch.  How Luke's men weren't all cut down or even the STuG made it past the AT rifle hidden in the woods on their flank, I don't know.  Similar to Andrew, with the off table barrage in effect, he had great trouble in actually getting his units onto the table.
Jason's Russian AT rifle in the woods - they got some shots in but I don't know if they stopped anything.
Jason's commander - clearly a revisionist shirker who spent most of his time shouting orders at no-one in particular from behind the safety of a hill.
"If you go into the woods today..." Russians hoped to provide a big surprise for the Germans rushing at them but Andrew never managed to get enough of them on the table and I don't know what happened to his KV.
In contrast, without an off-table barrage to contend with, Luke's Germans had no such difficulties: a squad shelters in the woods and contemplates the hazardous dash across the open ground in front of them.
Russians bug out: the survivors of Andrew's second(?) squad on the left of the crossroads have had enough - the five of them are carrying at least ten hit markers. At least the Gaz truck came in handy - if they can get it started before the STuG gets a bead on it!
The end of the game came quickly. After driving off/destroying the second Russian squad opposite, my squad on the far right poured fire into the house - MG nest/Russian jump-off point/objective. After several rounds of intense firing including (once more) an accurate mortar round, there was one man left of the five-man crew. Once the MG was captured/destroyed Soviet morale in the village (Sowchos 79) collapsed and the remaining Russians ran for it, leaving the village and a smoldering colander-like KV in German hands.

On his side of the table Jason had not suffered much loss but it didn't matter as everything on the other side of the frozen river was gone before he could get most of his units engaged. I tallied Russian losses on my side of the table at around 40 men - three and a half squads, a Maxim HMG & 5 man crew and two? KV crew for the loss of one Panzer crewman, one NCO and four Schutzen (and two or more holes in my Panzer III). Quite a result but I will admit I got lucky - the Maxim could have easily annihilated my squad  jumping the wall on the road to assault the house - had not a lucky mortar round (I think it was) took out another of the MG crew.  Equally any of the three or four hits the KV got on my Panzer III could have destroyed it - then it could have been a very different story.  Anyway, now they've cleared out Sowchos 79 the Germans can get on and rescue the 6th Army in Stalingrad right?

I enjoy Bolt Action but I do find Chain of Command far more satisfying.  Just the difficulty of getting orders out to get your units to do what they must accurately reflects what it must have been like in the chaos of combat.

Got to thank Matt and the boys for inviting us to Goulburn and for Andrew, Jason and Luke for a great day's gaming.

Tuesday, October 6, 2015

Bolt Action Op LIGHTFOOT game

Taking a break from painting up my Bavarians (and domestic duties various!) just had a great Bolt Action game at Jolt Games in Mitchell so I thought I'd post the AAR and photos of the day.  The scenario for the game was loosely based on Operation LIGHTFOOT, an Allied armoured assault on an entrenched Italian held position in North Africa, devised by Andrew our Bolt Action guru. My mate Paul and Andrew played the Allies and myself the Italians (a nervous first for me).  Given the Italian propensity for morale collapses and running away - two more unit losses than the Allies and you have to test to see who stays and who doesn't - I was rather worried about just how resilient my Eyeties would be under a sustained armoured assault. As you can see from the following photo of the Allied armoured juggernaut waiting to be deployed - I had good cause to worry!


Another attraction of this scenario was the availability of air cover for both sides. I bought 'Doc's Airforce' along with a Blenheim bomber, Hurricane fighter and Gloster as a scout plane for the Allies and a Stuka and a Macchi 'Arrow' fighter for the Italians - each side diced for which plane and when they came on.  Luckily for me I got the Stuka which took at least three turns after I got it before actually coming on to attack, doubly lucky as the Allies did not have their usual Ack Ack - Andrew left the Bofors at home - while the Italians had a 90mm monster mounted on a truck which doubled as either a heavy AA or super-heavy AT gun. Unfortunately for Paul and Andrew they were only able to get a scout plane on at the end of the game (survey the damage I suppose) so I never got a chance to check out the 90's AA capabilities! Not that it mattered, as an AT it is superb - easily as good as an 88 - and had a major affect on the outcome of the game.

The 90mm author of much mayhem...  'effin' big gun on a truck! I had no idea the Italians had something like this.
Hot work on the 90 - carting those monster shells up there would have been quite a job in the desert heat!
The generous tables in Jolt meant that it was also a chance to test out my new desert battle matt - all 12' of it - and given the size of the respective forces, we needed every inch of it! Biggest WWII game - at least as far as armour is concerned - that I've ever been in! The combination of Andrews and my Italian armour gave me a decent force of about five M13/40s, three Semovente AGs (two of them with 75s) and a half dozen L3/35s, one with a 37mm AT gun as well as various scouts - a Lince (as armoured command vehicle) an Autoblinda with a 37mm autocannon (sweet!) and my awesome Sahariana. Together with two full platoons of infantry (3 x sections each) together with two 75mm field guns, 81mm mortars, HMGs and Elefantino AT guns it was quite a large defensive force.

Infanrty section with sniper team in the palm grove, next to it a well fortified position next to the other road into town protecting a 75mm field gun, a HMG and an 81mm mortar with a Semovente AG (47mm gun) parked behind the barbed wire barricade next to it
Italian infantry defending a native grove of some sort but behind them a major trench complex bristling with MGs, ATs and mortars AND the command. Strangely I don't think one shot was fired at it the entire game. 
Needless to say my careful preparations still did not prevent first blood to the Allies and my Sahariana brewed up after her crew abandoned her on fire. A British scout (Daimler?) fitted with a Boyes AT gun (i.e. giant rifle) scored a shot on the rapidly reversing Sahariana setting her fuel cans on fire.  I failed the saving roll so the crew, rather than put the damn fire out, abandoned the vehicle.  Oh the shame, the shame!  Personally, I blame that useless sot of an NCO swigging on his vino in the back of the car. Andrew reckons its the first time he's ever seen a Boyes AT rifle set fire to anything in a BA game, let alone knock something out.

Momma mia shes-a burnin'!

Shameful - the abandoned Sahariana goes up in smoke
The loss of the Sahariana right at the start meant I had nothing to radio in what was coming through the town approaches but for some reason my opponents seemed intent on driving down the gun-barrel straight main road on the right flank.  That would be the one I parked my truck with the 90mm at the other end. The response was swift and just as deadly.

Op LIGHTFOOT opening shots - and the 90's first victim  (this is one end of the table - the 90 is at the other end!)
Under fire the Autoblinda beats a hasty (albeit temporary) retreat - finding that reversing gear rapido as the Allied lights - a gunned up Humber scout and two Honey's race onto the table
The Allies very nearly drove in my scouts which would have blinded my guns as they were acting as the Forward Observers. Nearly.  Actually the 'Blinda performed magnificently and even if it took half the game to discover it was armed with an auto cannon (two shots instead of one) it gave good account of itself, getting pins on the Honeys and more importantly NOT running away but providing a blocking force of its own that meant the only way out of the town was down the road - where all my ATs were ranged in!  It was down this road that Paul's Vickers light tanks raced - to their doom (brave lads tho)!

The 'light' Semovente AG claims the first Vickers
As expected the Allied armour poured on in successive waves - so much of it I believed it was only a matter of time before they started to overrun my outer defenses. But that never eventuated as the brave 'Blinda held up the Allied lights in the centre and the awesome 90mm Super Heavy AT gun got into action. The Allies had four Matildas, two Valentines and a Bishop (25pdr on a Valentine chassis - a sort of British KV - and almost impossible to stop with most of the lighter Italian ATs) as well as a Crusader, two Honeys and two Vickers Light tanks and four armoured scouts: Humbers and an ancient Rolls Royce - the later with armour so light it was classified as a truck - mounting a Vickers HMG turret though. Add another two 25pdrs and numerous 2pdr ATs including a portee and there was plenty of fire-power to be unleashed on the Italian defenders. It should have been but much of it never got the chance as an enormous firefight developed in the the centre and the 90mm began to pick off tank after tank as they tried to come down the main road.

Another one bites the dust... the Crusader falls victim to the mighty 90
A tough-as-nails Matilda succumbs to the 90 - the marker in the middle is for my eventual air strike that I called in because even the 90 couldn't contain all that armour

The third thing that sealed the game for the Axis was the air strike. I got lucky with the dice and got the Stuka rather than the little Macchi fighter but it still circled for three turns before finally striking (trying to communicate with the Italians on the ground - he probably just ordered a pizza with the lot). One more turn and the target would have been too dispersed but it had a second Matilda with accompanying infantry section behind and a newly deployed 25pdr to one side. The tank with its thinner top armour stood little chance with a direct hit.  The infantry behind rather than dive for cover stood up and blazed away - very tough boys (Aussies of course) and although loosing two of their number, continued to advance sans tank cover! The 25pdr took the other direct hit and amazingly (bit controversially I think) was not damaged or destroyed BUT the crew were either killed or ran off (whats that? RHA abandoning its gun? Never!!! I hear you say) so quite a result for the Stuka. No wonder the Allied infantry hated them - its been my experience that whenever they've been used in a BA game they have caused major destruction - save once which we blamed on the Italian pilot and on one other occasion when Andrew remembered to bring his Bofors!


The surviving Matilda continues to grind forward... very very sloooowwwly.
The Allies got absolutely hammered on that open road BUT despite their armour losses, pressed home the attack without the tanks.  Aussie infantry y'see - tough-as-nails!

The centre of the battle was no better - absolute carnage ensued.


The battered 'Blinda had played cat and mouse with the Humber scout and two Honeys for the entire game - getting shots in with its 37mm - which slowed Honeys down as they in turn tried very hard to kill it off. One finally got around behind an put a shell into the engine compartment that started a fire but either passed right through or failed to explode. The Autoblinda's engine was kaput so she ended up unable to move from her perfect blocking position even if she'd wanted to AND (more amazingly) the crew didn't bail but chose to fight on. That's gotta be a first for a buggered up Italian AV! After taking care of the two Vickers I sent the Semovente to its aid where it dueled with the second Honey but was caught as the Humber sneakily drove  OVER the hill and bushwacked it from above.  The 'Blinda gave the Humber two in the guts from point blank and brewed it up in turn.  The 'Blinda also disabled the Boyes mounted scout that killed my Sahariana as it tried to find a way out of town other than the rather dangerous road. Set on fire the crew abandoned it rather than putting the fire out - just like the Sahariana!
Autoblinda about to get one up the derriere from a soon-to-be-cactus-itself Honey. Note the Rolls Royce tin-can in the background - its story was as nearly remarkable as the 'Blindas.

The Autoblinda after copping a stingy one in the rear continues to blaze away at anything and everything - on this occasion the Bishop mobile 25pdr (just out of the photo) - but despite scoring repeated hits Andrew very un-generously ruled no damage, not even a thrown track. That's what happens when your armed with a pop-gun, full marks for effort though. Note the AT armed L3/35 behind causing mayhem amongst the cluster of Bren carriers. They had disgorged their Vickers HMGs to deploy in the open where they were all eventually destroyed by intense Italian fire.
Paul's Rolls Royce AC is a virtual tin-can so light armoured its rated as a truck (thus vulnerable to small arms fire).  Despite being vulnerable to just about everything it charged madly forward against the Italians in the palm grove, blazing away with its Vickers HMG. Never has one tin-can fired so many rounds with so little result BUT I'll be generous and say one or two KIA and the entire squad pinned, hugging the dirt for the rest of the game, only a casualty or two away from bolting in my opinion. 


The Rolls managed to achieve this despite having every available weapon that could get a bead on it firing at it. It must have resembled a colander but kept on blazing away at its tormentors. At one point no less than four mortars FAILED to range in on it (see coloured dice next to it in photo below).  That's one serious bug I have about about Bolt Action - its way too hard to range in with mortars as it requires a D6 to do so. History tells us they were far more accurate than that in experienced hands - more casualties caused by mortars than any other weapon apparently so they were  effective. The Italian 81mm was considered one of the best in WWII and the Italians knew how to use them - quite deadly in experienced hands SO I say with an experienced team D5-6 to get on target, only a D6 for an inexperienced mortar team. For a veteran team make it 4-5-6.  Gotta make mortars more useful in Bolt Action I say. 


But I digress - the Portee (truck-mounted AT gun) deployed and took out my M13/40 sent to bolster the flank.  Showed the risk of my strategy of relying on defence's firepower and feeding my armour reserves in piecemeal.  Here the effectiveness of the Elefantino 37mm ATs also comes into play - they took out the Portee at long range. Against lighter vehicles and tanks they are as effective as any other AT gun. 


At this point we were running out of time as after eight? or more turns the Allies had failed to crack the Italian defences and had lost over a half of their armour destroyed or abandoned for Italian losses of one Semovente, one M13/40 and the Sahariana scout (burned out) and the Autoblinda immobilized (but still shootin'!).  One L3/35 had pinned the furthest most infantry and wiped out half a section with repeated twin Breda MG fire. Losses amongst Italian infantry were negligible - two or three - although both forward sections were pinned. The 75mm gun in the middle took two hits from one of the 25pdrs, gaining a host of pin markers and loosing two crew but the surviving gunners remained at their post. Brave lads - a bottle of grappa from the commanding tentente is on its way to their position I'm sure! 


The Allies could not get their air cover going at all and in the end a scout overflew the battlefield to radio back the Allied failure to crack the Italian defences and Op LIGHTFOOT was called off. The Allies withdrew also leaving two damaged tanks and an armoured car abandoned for the victorious Italians to recover.  Quite a convincing victory to the Axis on this occasion. Dug-in Italians with plenty of AT and armour (even tankettes like L3s) are a tough nut to crack, despite their sometimes fragile morale.  

The advantages to me in this game were the extra commander which gave me initiative on all but two or three turns AND the super-heavy 90mm AT gun which in hindsight really should have been targeted by whatever means necessary by the Allies from the outset.  Without the damage it inflicted on the that flank I doubt I would have been able to have kept the Allied armour from overrunning at least my outer line of defense. Had THAT happened then the dodgy Italian morale thing would have almost certainly come into it (and who wouldn't run from a Matilda - especially as they're so slow you probably could outrun one if you tried!) 


Big thanks to Andrew for organising and both he and Paul for being the most congenial of opponents. A really great day's wargaming was had by one and all at Jolt Games in Mitchell. Do yerself a favour and get down there for a game (and tell 'em Doc sent you!)