Wednesday, January 29, 2014

Muskets and Tomahawks along the Ohio - the French and Indian War games at Cancon 2014


The French & Indian Wars skirmish game 'Muskets & Tomahawks Along the Ohio' was one of the most successful demonstration games at the biggest wargaming convention in the southern hemisphere, Cancon.  A big call but in my opinion this was right up there with demo (public participation) games like the 100 Days in Peking (Boxer Rebellion), the Alamo, Isandalawana and Froeschwiller (Franco-Prussian War of 1870) from previous Cancons.  The games also showcased Doug and Andrew's superb F&IW figures and Andrew's sublime scenery making skills with his incredible Indian village, French outpost fort, town and docks.

The demo games are staged to showcase the hobby and attract people who may have not experienced historical wargaming before. Its quite a challenge with the hordes of fantasy and competition gamers at Cancon but we always manage to get a high percentage of 'newbies' to our games - half of them have little gaming experience.  Many of them are youngsters who have never played an historical wargame before.  Over the two days we had at least half a dozen 12 and under who took a command and rattled some dice one of whom, young Alex, proved a determined British commander, fighting his Mohawks and later the British artillery to great effect throughout.

I commanded the French for the two days and Doug the British, with Andrew as Umpire and John as a British co-commander on Day 1, French on Day 2. There were approximately four guest commanders per side for each game until the 'big bash' last game on the final day.  This was a spectacular encounter battle with all the figures on the table for which we commanders stepped back and gave the game over to eight enthusiastic guest British and French generals who fought it out to a draw - perhaps narrowly in favour of the surviving French who held most of what was left of the town.

Yours Truly capturing the set up with Andrew's terrific scenery of fort and docks for Day Two, Scenario Three [Andrew's photo]
The games were devised by Andrew using the great Muskets and Tomahawks skirmish rules and consisted of three scenarios involving British attempts to rid the Colonial American frontier along the Ohio river valley of the threat from the dastardly French, who had been conducting incessant raids on American settlements and wresting control of the strategically vital valley. The British forces consisting of the Highlanders (regular Grenadiers and irregular light infantry) and the Virginian Provincials under no less a personage than Captain George Washington and also included other colonial militia and of course the famous Rangers as well as Britain's Mohawk Indian allies. The French consisted of their Compagnes Frances de la Marine regulars and their own tough frontiersmen irregulars the Coureurs de Bois as well as hordes of their Huron, Delaware and Shawnee Indian allies. The first scenario was the British attack on the French Indian village, the staging post for their merciless raids. The British objective was to capture and destroy the village and wipe out as many of the Indians as possible.
The British raid was like kicking over an ant's nest - swarms of angry Indians emerged. [Photo courtesy of Ian]
On the right the British pressed home their attack, wiping out the Indian bands sent out to stop them...  
 ...but then running into the tough Coureurs de Bois who mowed down the Scottish light infantry
While initially successful on their right, the British were in some trouble on the left. Two thirds of the entire Indian force attacked the Rangers and allied Mohawk Indians. The Rangers did a very un-Ranger-like thing and ran away after copping some shooting casualties and their Indian allies were left to valiantly take the fight to the savage Huron by themselves. Outnumbered over 2 to 1 they were wiped out in the ensuing hand-to-hand.  The French were on the verge of victory but as frequently happens in 'Muskets and Tomahawks', in one turn the situation changed.

Under the direction of their Paramount Chief (figure in blue at top) the victorious Huron having wiped out the Mohawks and forced the Rangers into retreat, they only have to roll up the British flank... what could possibly go wrong?
The Rangers rallied and poured fire into the swarming Huron who were caught out in the open. The Mowhawks had sold their lives dearly, destroying nearly half of the attacking Huron before succuming themselves which fatally weakened the Huron who simply could not absorb the shooting casualties inflicted on them by the vengeful Rangers. Even the Paramount Chief who had personally killed four (three by shooting and one in hand-to-hand) fell victim to accurate Ranger shooting.  It was too much for the surviving Indians who withdrew back to the relative safety of the woods.
Its Indian versus Indian as the valiant Mohawks attempted to stop the Huron swarm in the woods on the left.
Indians doing what Indians do - the Huron run away after being shot, only to return the next time to shoot back (while hiding behind a tree of course)! Very pesky them Injuns.


On the right the British suffered heavy casualties but were finally able to break into the village and wipe out the remaining Coureurs de Bois. This left the remaining Indians isolated on the right so the French called it quits and retreated off the board.  A costly but rather complete victory to the British.

'I'll do YOU Jimmeh!'  A crazed Hairy MacTavish in amongst the French who eventually clubbed him to death but didn't like it up 'em and ran away. 
Highlights of the action included the French colonial militia (armed civilians) taking one look at the British in Turn One and running away - perhaps it was all those hairy men in kilts?  The Scottish Light Infantry got wiped out in a frontal assault on the village across open ground - all save one man who launched an attack on his own on the Coureurs, hacking down several before going under a welter of French tomahawks and musket butts. Followed by more accurate shooting from Washington's Provincials it was too much for the Coureurs who finally broke and fell back to their longhouse barracks in the village, where they were eventually destroyed.

Doug, John and the British commanders contemplate a long march up a long road through the forest and what indeed is waiting for them in them thar woods! Their Ranger scouts peer into the gloom and sniff the air - is that a faint whiff of garlic they can detect?
In the second scenario the French (with their much reduced Indian allies) attempted to stop the British from marching through the only road in the Ohio wilderness to reinforce their attack on the French outpost. Again it was a close battle up until the final two turns but again the French were defeated.  Another enjoyable product of these rules is that they can produce some amazing feats of daring.  In this scenario, despite eventually losing, it was the French who produced some remarkable unit and individual results. 

French general Greg, faced with overwhelming numbers, cleverly leapfrogged his Coureurs from one patch of forest to the next - fine as long as the cards favour you but bad when your opponent's card allows him to get the jump on you. Fortune is fickle in 'Muskets & Tomahawks'!
Washington urges his cautious Provincials up the road while long lines of regulars, Indians and Rangers advance through the woods on either flank
The Rangers and Marines start the firefight on the French left with young Alex's Mohawks about to attempt to outflank the French in the woods. The French militia are top right hidden in a dip in the road. Quelle surprise pour les Anglais!
Cop that Anglais!  The French militia pop out of their little hollow in the road and let loose.
The highlights included the French militia who, after their shameful performance in the first battle everyone (including the French commanders) expected to run away at the first whiff of musketry.  We couldn't have been more wrong.  To give them more of a chance the militia hid in a dip in the road but I fully expected them to drop their muskets and flee at first contact with the British regulars coming down the road.  They popped out of their hollow and let off a volley at the regulars that stopped the latter in their tracks, then received a volley in return. For a moment it looked like that was it it but no, they copped casualties and hid in their hollow before popping up again and firing twice more, inflicting more casualties on the startled British before the latter gathered their wits and saw them off with a volley of massed musketry.  The militia proved redoubtable, half the unit destroyed before they finally broke and ran for home.

Despite not often getting the cards he needed French Coureur commander Greg's clever tactics paid off against superior British numbers as he prevented them from breaking through on that side of the road.  On the other side I was not as successful and saw my command of regulars, surviving Huron, militia and Marines gradually wiped out. 

The Huron chief shows how its done - he's the guy in the middle facing the Mohawks in the woods, he's thrown his tomahawk, taken out the first guy and is about to go 'chop chop chop' on the remainder with his war axe. All but the Mohawk chief ran away.
But it was my Huron and marines who provided two of the most spectacular feats of combat.  My Huron warband (all that was left from the first game) tried to outflank the British through the woods but were thwarted once again by young Alex's Mohawks. The move fell short as the British got a run of activation cards that enabled them to bring up all their Rangers and Indians and blaze away at my French regulars.  Stalled in the open I was able to activate my Huron chief 'Magua' who decided to show his hesitating warriors how it was done.  Charging ahead of his two warbands he started hacking into Mohawks and Rangers opposite.  He hacked down three Indians and two Rangers in hand-to-hand, driving off two warbands and a section of Rangers before finally being killed himself by the Mohawk chief who he had attacked from behind and hit on a D6. I then rolled a 1 and died. Oh the injustice of it all!  But in spite of my whining as Andrew pointed out, that's the way the rules work - and I rolled too low when I needed to roll higher than the other guy.


The last act of heroism came from my surviving Marine. After his entire unit (save the officer, above) was destroyed by Rangers in musketry and two rounds of melee, he was attacked again by no less than three opponents in the final round. The bodies of his previous victims still on the ground in front of him he killed a third, then a fourth and the others simply gave up and ran.  The second and third units of Rangers, gazing in horror at the mound of dead Rangers in front of the crazed Frenchman, simply emptied their muskets into him.  No less than seven hits left him a very brave but now very dead bullet-ridden corpse. Ca la Guerre.


My brave Froggie Marine, last heard yelling 'I fart in your general direction!' before he disappeared in a hail of musket balls
The final acts of Scenario Two involved the destruction of my remaining units on that side of the table. Despite Greg still holding the right with his remaining Coureurs de Bois, young Alex's surviving Mohawks now effectively swept around the now non-existent French left flank onto the undefended road, cutting off the remaining French and winning the game for the British.  

That was just Day One of the Muskets & Tomahawks action at Cancon. 

Day Two and the all-out British assault on the now beleaguered French outpost and fort promised to be a cracker of a game and with Doug's riverine fleet and Andrew's scenery, quite a spectacle.  But that my fellow bloggers, I will post separately as with all the pics, this post is becoming unmanageable for Blogger. More action and tales of derring-do tomorrow!

Friday, January 3, 2014

Finishing off my WWII German force

I just realised that its been well over a month since I posted anything. Very slack but I have as an excuse that this year Christmas etc got in the way. Coming to the end of my Chrissy break I thought I'd better post something on what I've been up to.  Mostly WWII stuff after finishing the box of British from Perry's for my Creforce units.  No sooner than I'd done that they announce they've made some Vickers LAVs - there were 9 of them on Crete operated by the 4th Hussars (the remnants of over a hundred sent to Greece) who fought them with incredible bravery, so a 'must-have' for my Creforce army.  But it'll have to wait as Santa has been very kind to me this year and I've had heaps of different projects to do and stuff to read.

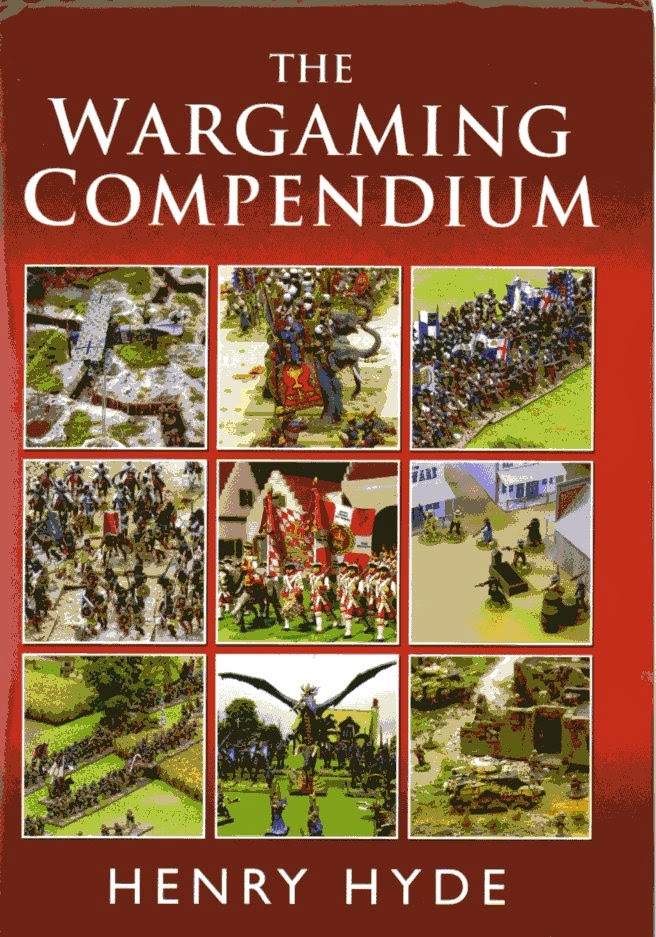
With regard to the latter I have to give a plug for Henry Hyde's 'The Wargaming Compendium'. I had heard good things about it on the hobby grapevine so I decided to give Santa a hand and get a copy. Fan-bloody-tastic read!  Its one of those books that's an instant classic. It's a 'somebody should've' on the hobby - well now somebody has and what a job they've done.  I think Henry's written it at a perfect time when the hobby has begun to expand exponentially and has finally matured, with something to appeal to everyone.  The hobby now spreading around the globe has never been so popular and the standard and range of figures and wargaming paraphernalia has never greater.  Henry has done a masterful job in documenting this as well as writing about the growth of the hobby from its roots. As a graphic designer and publisher of no mean talent himself, Henry has packed his beautifully presented Compendium full of mouth-watering wargamer eye-candy. Every dedicated wargamer should have a Compendium so do yourself a favour and get one!

After finishing my Perry's Austrian Grenzer I thought I'd tackle the problem of finding some figures to make up my German Mountain troops (Gebirgsjaeger) for the Crete campaign. I could not find the right figures in peaked caps (their treasured 'Gebirgsmutze') so was on the edge of buying something metal when I spied a box of Perry's DAK at my mate Dean's shop. Had to have 'em didn't I? In the end I decided to use all the peaked cap heads in the box  and painted them up in the tropical green kit they wore in Greece. They also wore sandy or khaki coloured shorts but as none of the Perrys come like that I went with the green outfit which will also allow them to fit in elsewhere in the European theatre. Like the Desert Rats box they were a delight to make up and although you wouldn't think so, no two figures are exactly the same - there are enough bits and bobs to do quite a bit of variation. Per box you get a full platoon (Zug) with three ten-man sections including an LMG team and a Headquarters section with officer, senior NCO, radio and support weapons teams for the PzB 39 AT rifle and 50mm mortar. Perfect to compliment my two para platoons.


I nearly stuffed the lot up when I base-coated them with a dodgy matt black paint can that made it look like so were coated in fine sand. I cleaned up as many as I could but couldn't be bothered with the fiddley chemically job required to remove paint from plastics so some look a bit rough close up but I still think they'll pass muster for gaming purposes!


The other thing I love doing with plastics are conversions. With plenty of kneeling figures in the box I decided to do a kneeling MG34 team using the loader's shoulder to aim. I had an MG ammo belt from a Tamiya kit that I added to the gun. Likewise the 50mm mortar was a 3-man team led by a corporal so a made another kneeling figure into the mortar team commander watching the fall of shot.


Just as well I had some extra bits as there appears exactly enough to do the figures as depicted and because I tend to do mine a bit different, I ran out of weapons etc. I was also able to add a few other bits like tent/groundsheet rolls, meal cans and so on to a few of the figures. You'll note nearly half are in helmets but that's OK as like the Aussie's and their famous slouch hats, the German mountain troop's prefered to wear their cherished Gebirgsmutze but were all issued with helmets, as can be seen in archive photos of them boarding JU52s for the assault on Maleme.  I'm sure when the metal began to fly more than a few would have put their tin lids on!


As I mentioned earlier I also finished my Fallschirmjaeger to make up nearly two full platoons plus heavy weapons support. I needed more rifle armed paras as all the boxes of them come with them armed with a large number of assault rifles and SMGs. For Crete they had double the number of LMGs (MG34s) and MP40 SMGs but the assault rifles didn't arrive until a year later, so they were mainly rifle armed.  Dean came to my rescue and ordered the rifle armed paras I needed which arrived in time to be part of my not-so-secret Santa gift to myself!


Two sections of the three section FJ Zug has a Gefrieter armed with an MP40, a lance corporal and six schutzen rifle armed.  These sections can swap rifles for up to two additional MP40s and another MG34. The third section is the command with a leutnant, senior NCO, radioman, specialist schutze (as runner or medic etc) and a sniper team. One of these can be swapped for a Flamenwerfer team if required.

Platoon Command section

Each platoon is also supported by a heavy weapons section of one medium mortar and an MMG (MG34 on tripod) each with 3 man teams.  They can also be a separate company-level support with Kettenkrad-towed Recoiless and AT guns. The paras may have been mainly light arms but they were superbly equipped - if they can get to retrieve those verdamten canisters in time!

The most recent project I have just completed in relation to the Crete campaign has been to do the Luftwaffe component.  For this I already had a JU87 Stuka and before Christmas had finished a JU52 transport but needed a fighter escort to complete. This was going to comprise an ME109 and a Bf110.  I have the former, although its a model I built when I was about 12 or 13 and is a bit too duffed up to be repaired, but I searched everywhere for a decent model of a 110.  Scarce as hen's teeth they are.  Just by luck I found one in a local hobby store for well under $20 (not bad as the store in question isn't known for its bargains!)  It was an unknown brand 'HobbyBoss' made in China (check out www.hobbyboss.com) Now this is usually synonymous with 'dodgy' but it turned out to be a very good model indeed. It was well protected and packaged with delicate parts wrapped so they didn't get damaged in transit - metal figure manufacturers should take note! Most amazing were the tranfers - the most amazing and detailed of any I have seen for a 1/72nd scale model. The biggest challenge I had was putting them on the finished model but I put that down more to my own ineptitude at model building than the manufacturer's fault!  Suffice to say I ended up with a very nice model of a Messerschmitt Bf110. I've painted it in the colours of ZG76 which flew out of Argos in May 1941.


I had to modify it a bit to put it in 'flight' mode (wheels up) and the model did not come with any crew or extras such as bombs or drop tanks. As Allied air cover was pretty negligible (shot out of the sky, destroyed on the ground or withdrawn by the time Op MERCURY was launched) the Luftwaffe fighters were used extensively in a ground attack role - the strafing and bombing was described as relentless - so I got some crew and a bomb from my old model plane bits box. In doing so I discovered I have mostly intact a very rare model of a Gloucester Gladiator biplane which I will be doing up for the Allies along with a Hurricane and/or an Anson to even things up a bit. I make up the second box of Desert Rats and get a couple of Vickers LAVs from Perry's and the forces for the Crete campaign will be pretty much complete.

That's about it from me for a while as I have to go back to work on Monday and more importantly, prepare for the Tomahawks and Muskets demo skirmish game at Cancon at the end of the month.

Finally, a belated but happy and prosperous New Year wishes to all the very patient followers of my blog!